User Management
User Management is accessible via the User Management menu item in the left navigation bar. It is only available to users with the Administrator or User Manager role.
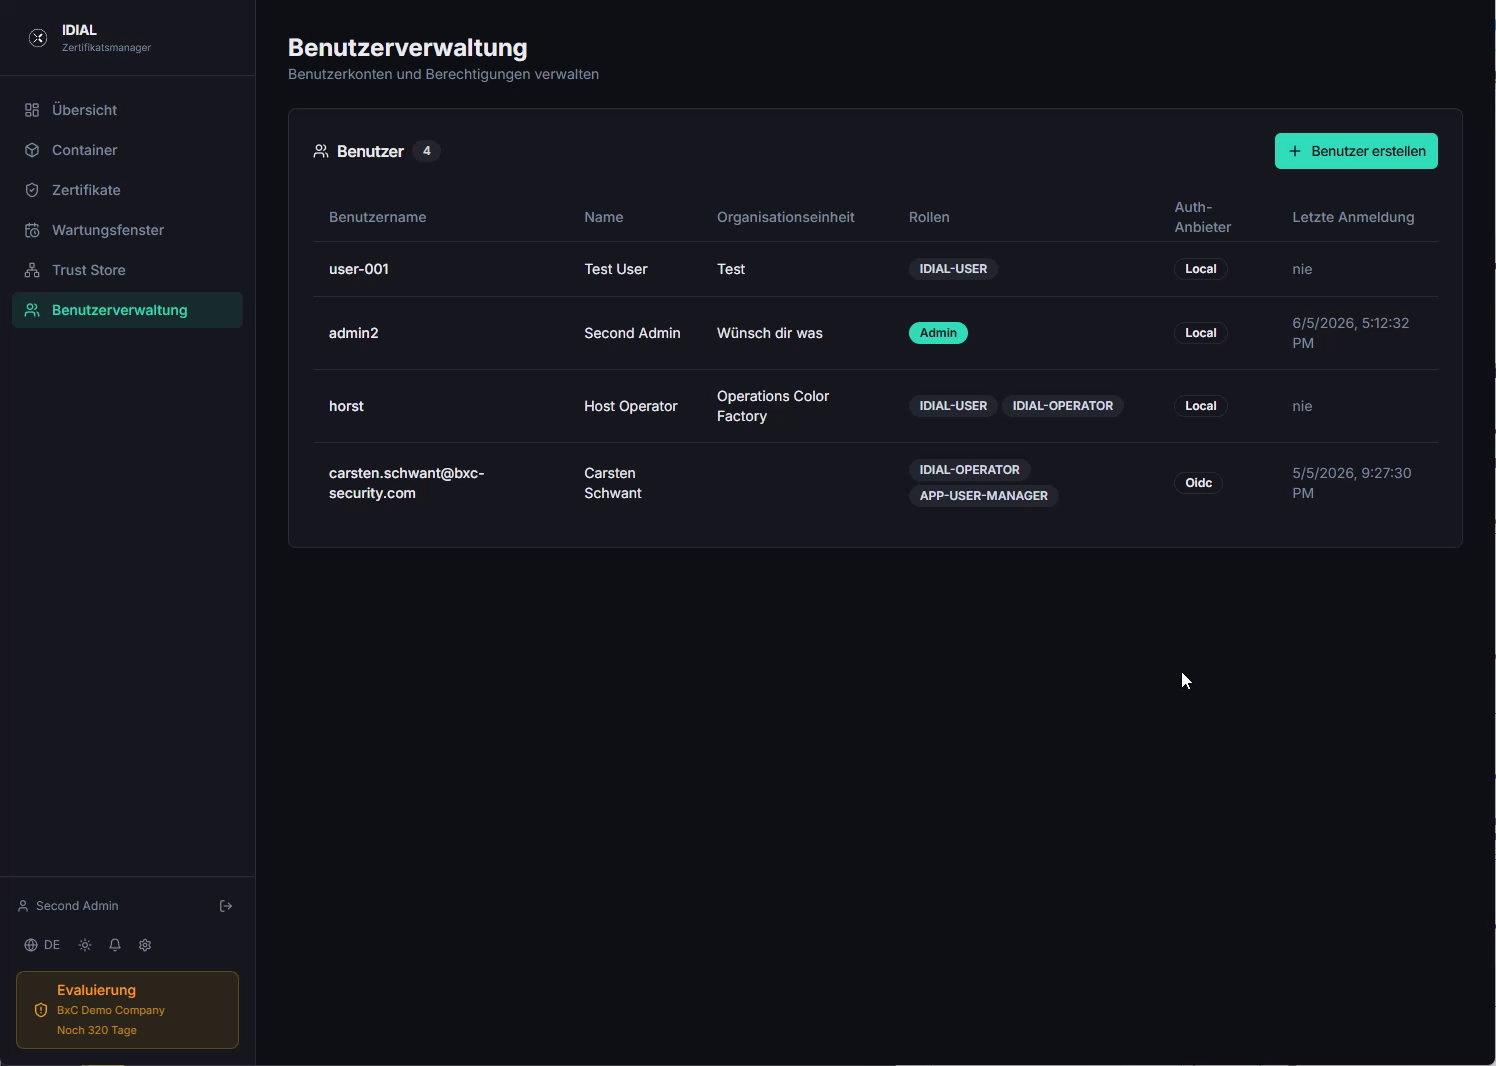
The list shows all registered users with their username, name, organizational unit, assigned roles, authentication provider, and the time of their last login. The Auth Provider column indicates whether a user authenticates with a local password (Local) or through an external identity provider via OpenID Connect (Oidc). The recovery-admin user is built-in and is not displayed in the list — it is always available as an emergency fallback account.
Role Model
IDIAL-APP supports the following roles that can be assigned to a user:
| Display Name | Internal Role Name | Description |
|---|---|---|
| Administrator | Admin | Full system administration rights over the entire application without restriction |
| User Manager | APP-USER-MANAGER | Responsible for user management; no access to containers and certificates |
| IDIAL Administrator | IDIAL-ADMIN | Extensive rights over IDIAL containers — configuration and management |
| IDIAL Operator | IDIAL-OPERATOR | Can operate IDIAL containers (start, stop, restart) as well as add endpoints and manage certificates on endpoints |
| IDIAL User | IDIAL-USER | Read-only access to containers and endpoints; no configuration changes possible |
A user can be assigned multiple roles simultaneously.
Create a User
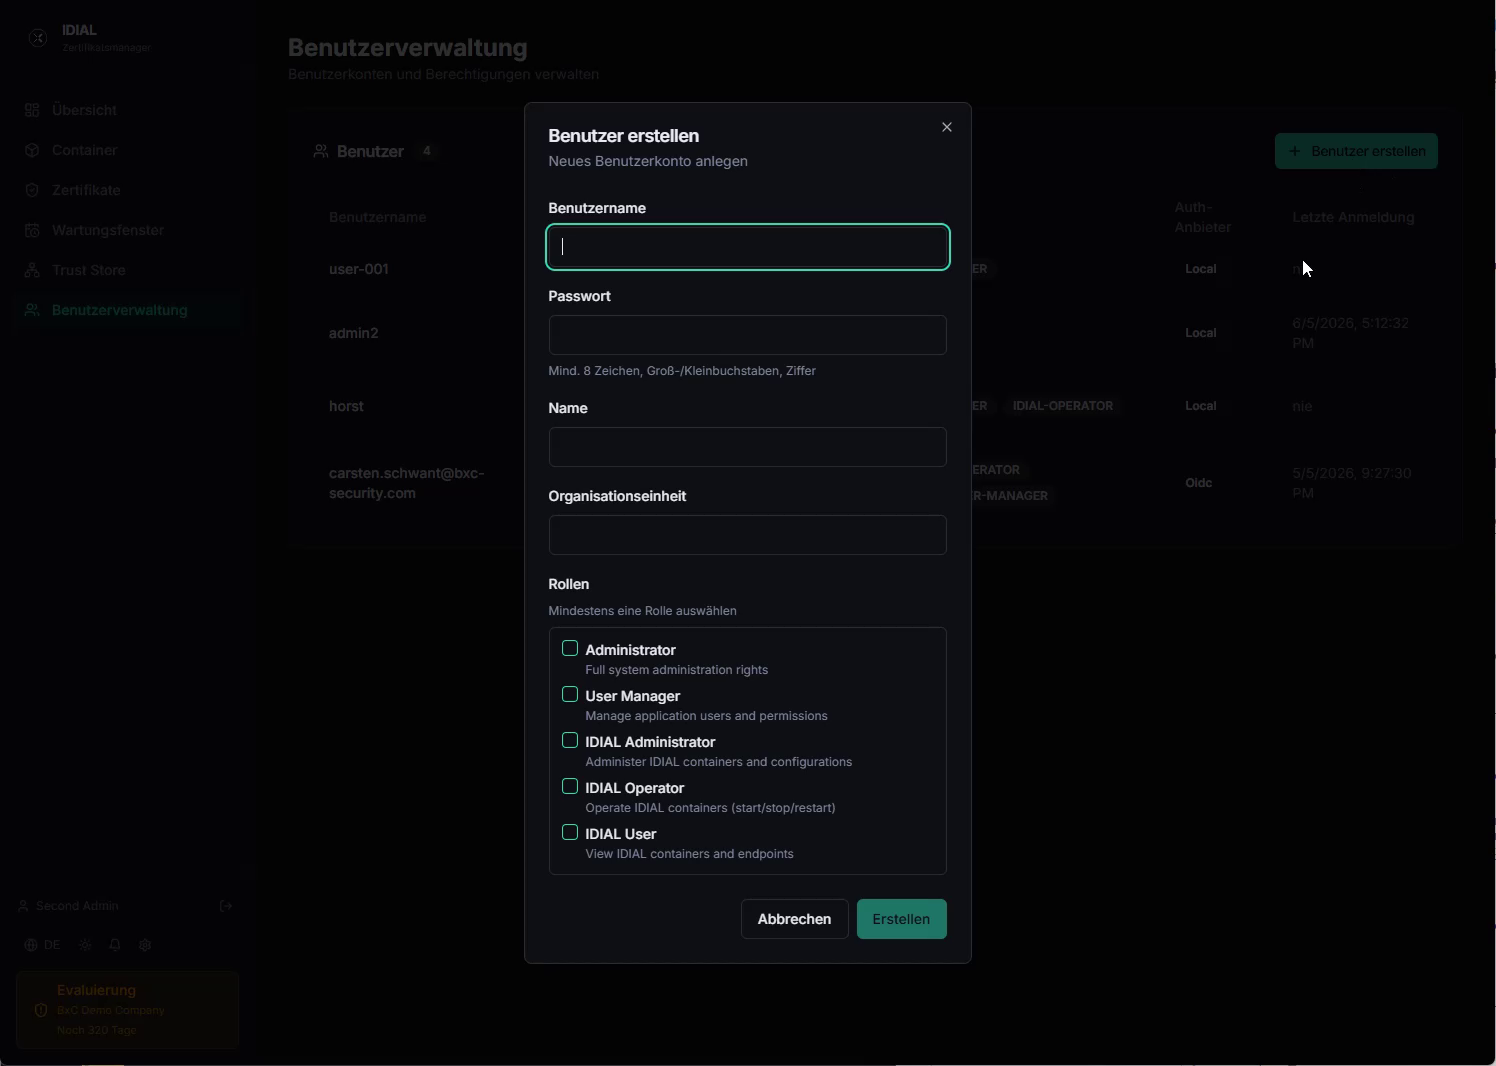
Click + Create User in the top-right corner to open the dialog for creating a new user.
| Field | Description |
|---|---|
| Username | Unique login name — 3–50 characters, allowed: letters, digits, hyphens, underscores, dots (^[a-zA-Z0-9_.\-]+$); automatically converted to lowercase |
| Password | Initial password — 8–128 characters; must contain at least one uppercase letter, one lowercase letter, and one digit |
| Name | Display name of the user — max. 100 characters |
| Organizational Unit | Associated department or organizational unit — max. 100 characters, optional |
| Roles | At least one role must be selected — roles are listed with a short description |
Click Create to create the account, which then appears in the list. Click Cancel to close the dialog.
Usernames must be unique system-wide (comparison is case-insensitive). The username cannot be changed after creation.
Locally created users authenticate through the application itself (Auth Provider: Local). Alternatively, users can be connected via OpenID Connect — this is described in the OpenID Connect configuration guide.
Edit a User
Clicking a user in the list opens the Edit User dialog.
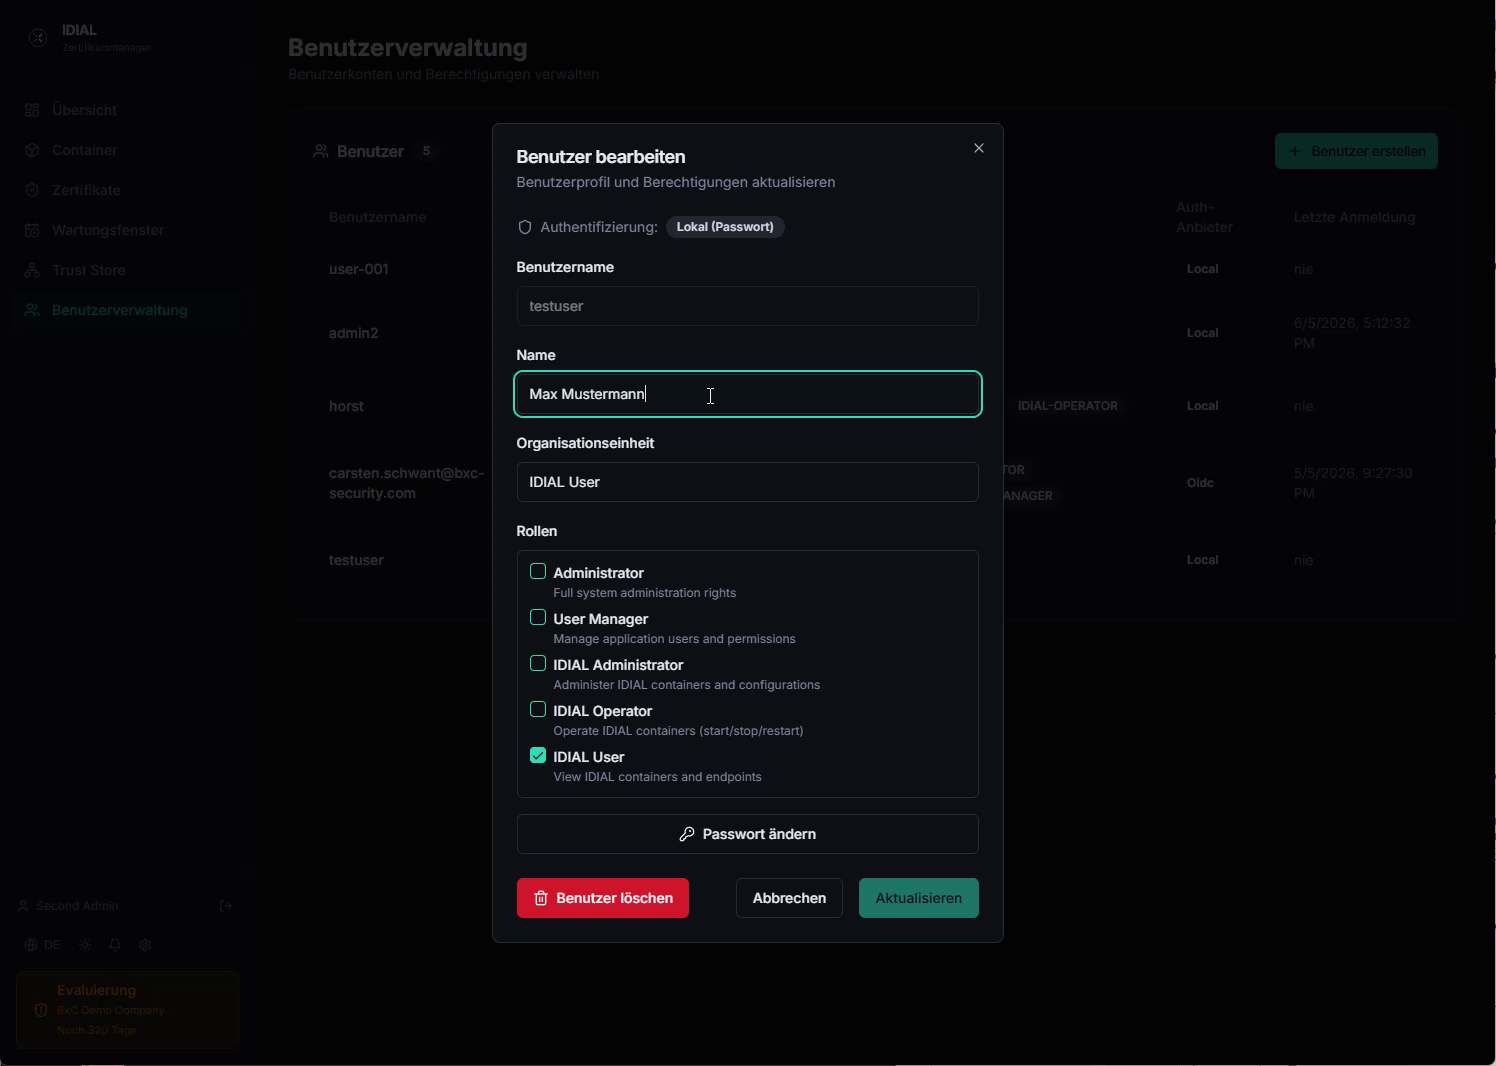
At the top of the dialog, the Authentication indicator shows which provider the user authenticates with (e.g. Local (Password) or Oidc). Name, organizational unit, and role assignments can be changed here. The username is read-only and cannot be changed. Click Update to save the changes.
Reset a User's Password
Administrators can reset the password of a local user directly without knowing their current password. The function is accessible in the Edit User dialog via the Change Password button.
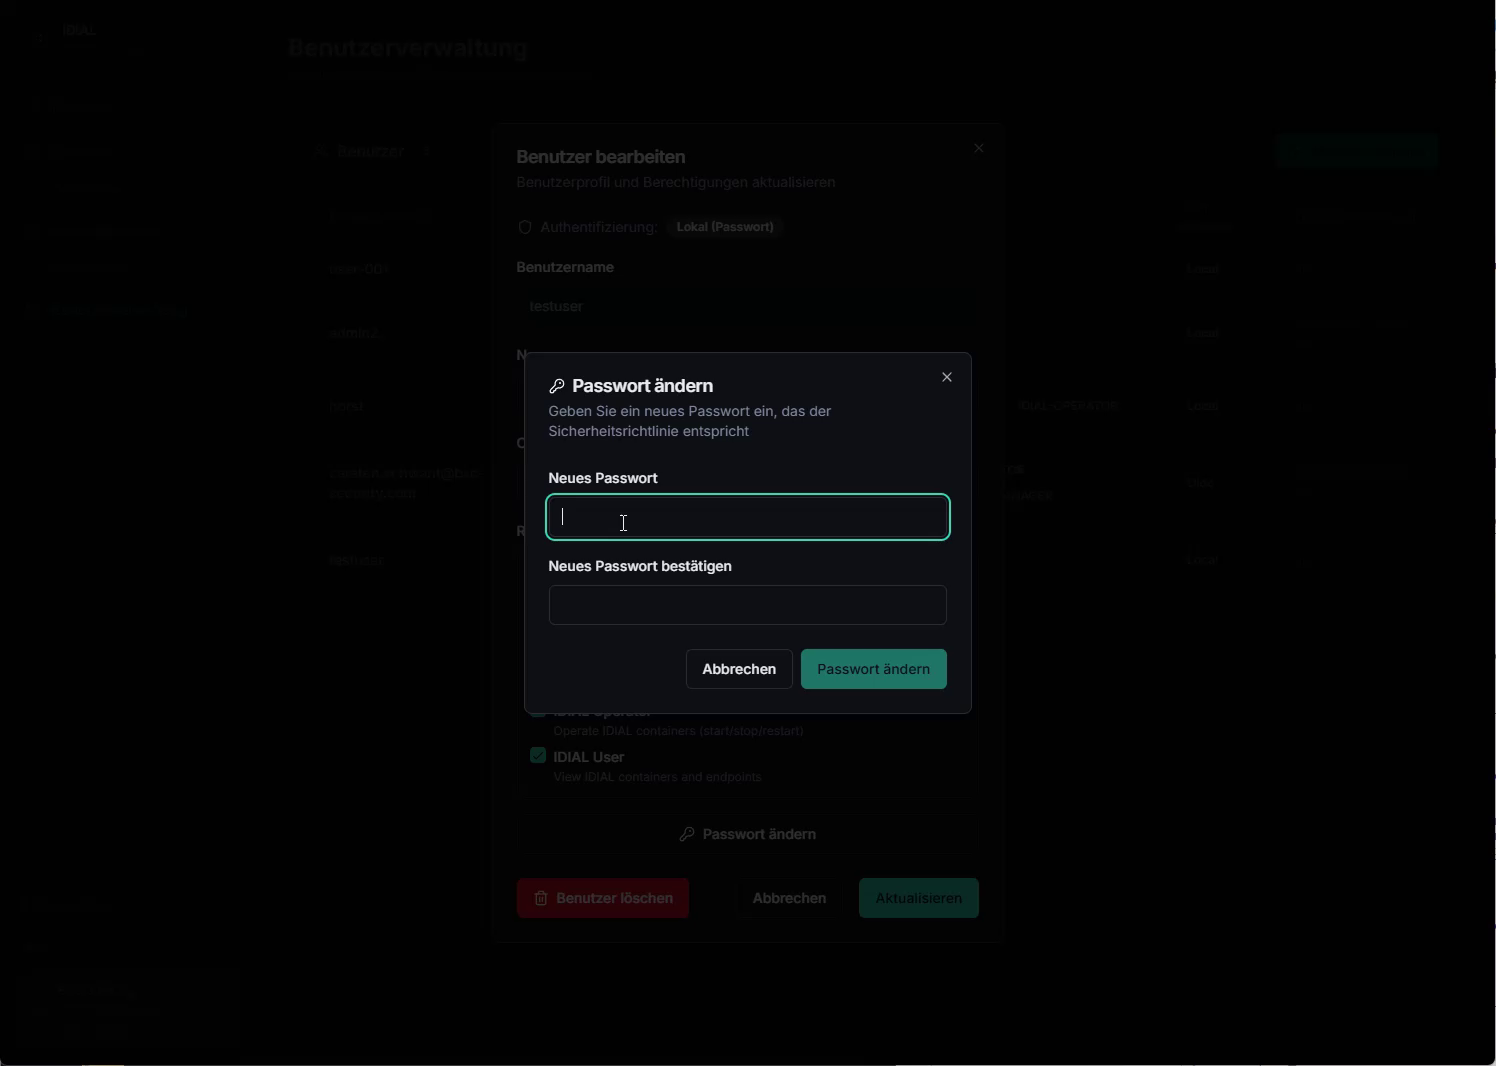
A separate dialog opens. Enter the new password in the New Password field and repeat it in the Confirm New Password field. The new password must comply with the password policy (8–128 characters, at least one uppercase letter, one lowercase letter, and one digit). Click Change Password to save the password. A confirmation message appears in the bottom-right corner of the screen.
Delete a User
The red Delete User button is located at the bottom left of the Edit User dialog. Clicking it opens a confirmation prompt.

Deleting a user cannot be undone. Only administrators and user managers can delete users.
Click Continue to permanently remove the user. Click Cancel to abort the action. After deletion, a confirmation message appears in the bottom-right corner of the screen.