Settings
The Settings page is accessible via the gear icon in the left navigation. It is divided into five categories, each opening its own sub-page.

| Tile | Description |
|---|---|
| Branding | Application logos for dark and light mode |
| Server Settings | Public hostname/port and TLS certificate for this app |
| Logging | Log level, file rotation, request/response logging |
| IDIAL Container Communication | Timeouts and logging for IDIAL container requests |
| OpenID Connect (OIDC) | Single sign-on via an external identity provider |
Branding
The Branding page allows customizing the logos displayed in the application. By default, the BxC logos are used.
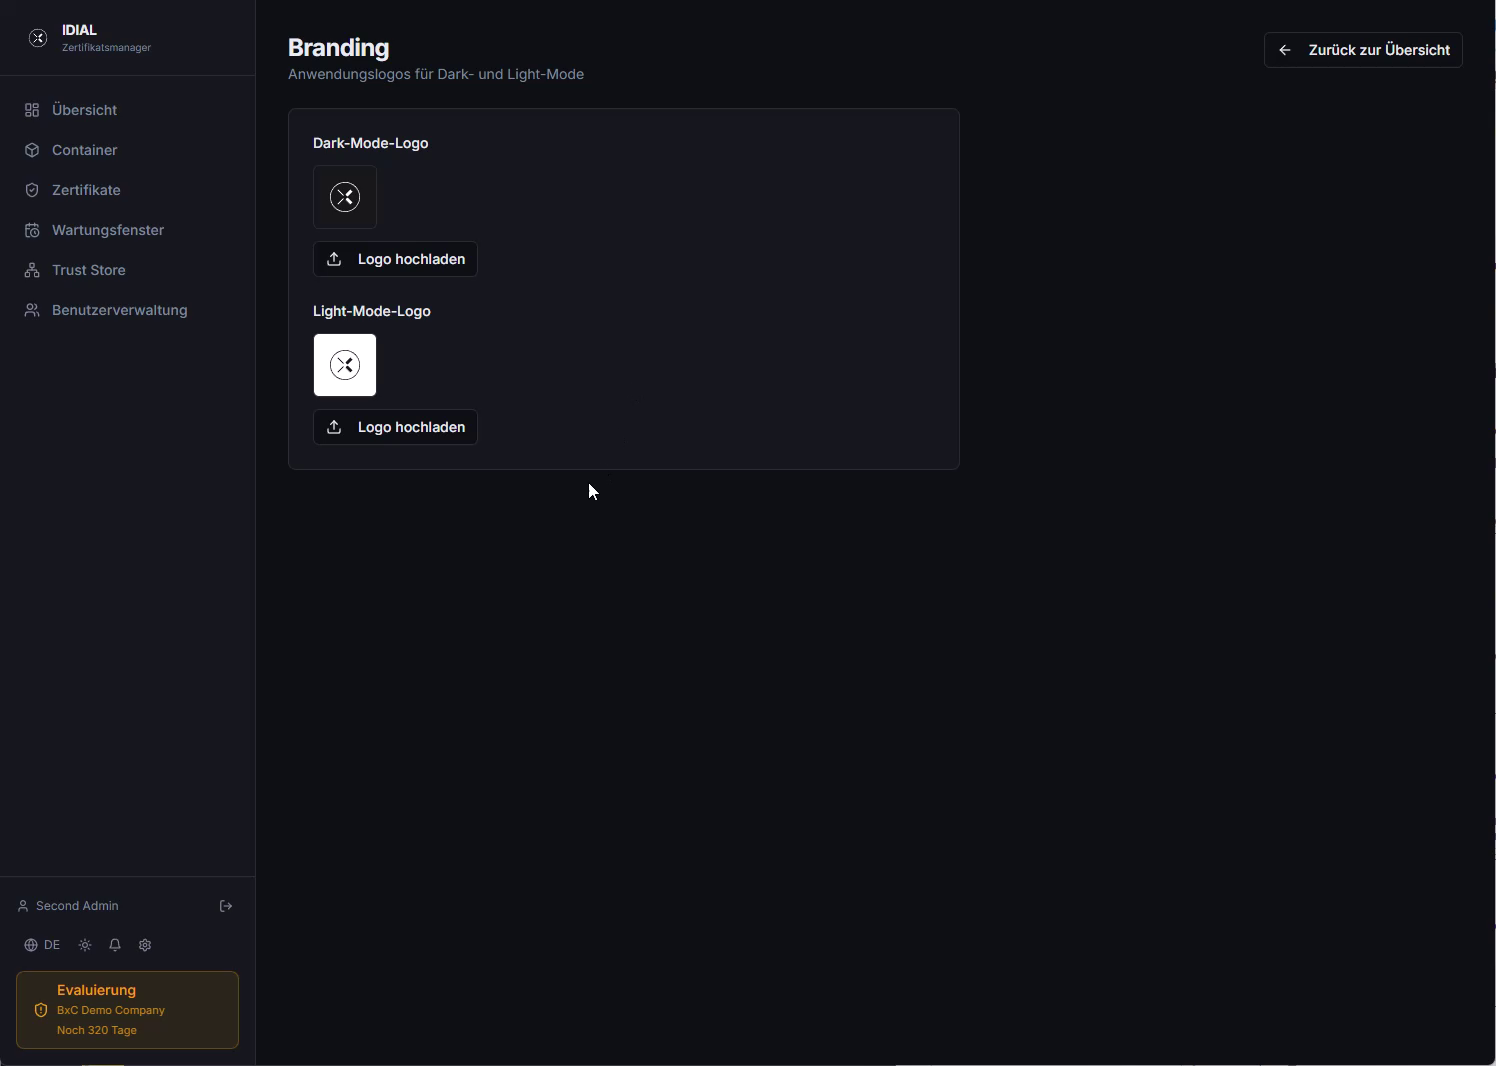
Custom company logos can be uploaded separately for Dark Mode Logo and Light Mode Logo via Upload Logo. If your application is only operated in one mode, it is sufficient to set only the corresponding logo.
Server Settings
The Server Settings page contains the central network and TLS configuration for IDIAL-APP.
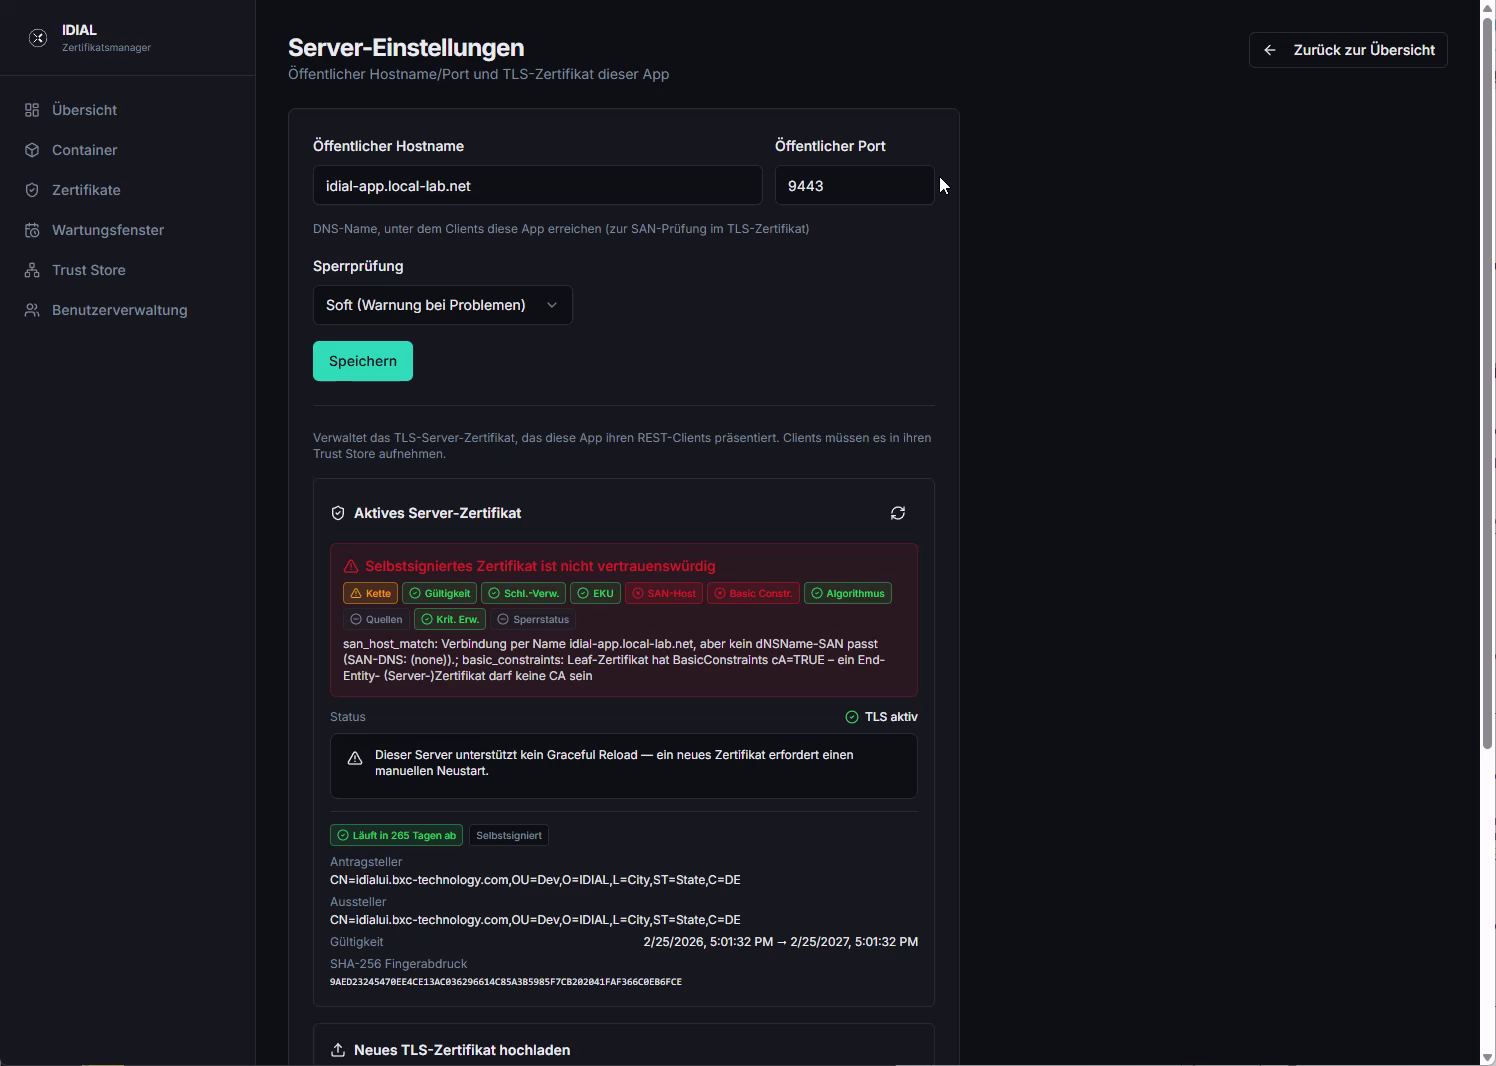
Public Hostname and Port
| Field | Description |
|---|---|
| Public Hostname | DNS name under which clients reach this app. Must match the Common Name or a SAN in the TLS certificate. Also used to automatically generate CRL URLs. |
| Public Port | HTTPS port of the application (default: 443) |
Click Save to apply the hostname and port before uploading a new TLS certificate.
Revocation Check
The Revocation Check setting controls how IDIAL-APP validates the revocation status of TLS certificates via CRL (Certificate Revocation List):
| Option | Behavior |
|---|---|
| Off (do not check) | CRL checking is disabled — no CRL server reachability required |
| Soft (warning on problems) | CRL is checked; if problems occur (e.g. CRL server unreachable or expired CRL), a warning is issued but operation is not interrupted |
| Strict (error on problems) | CRL is strictly validated; if the check fails, the certificate is treated as invalid |
Active Server Certificate
The Active Server Certificate section displays the currently active TLS certificate with status badges, subject, issuer, validity period, subject alternative names (SAN), and the SHA-256 fingerprint.
Out of the box, a self-signed certificate is active, which is marked as untrusted. After uploading a valid PKI certificate, the section shows App trusts this certificate and all checks are marked green:
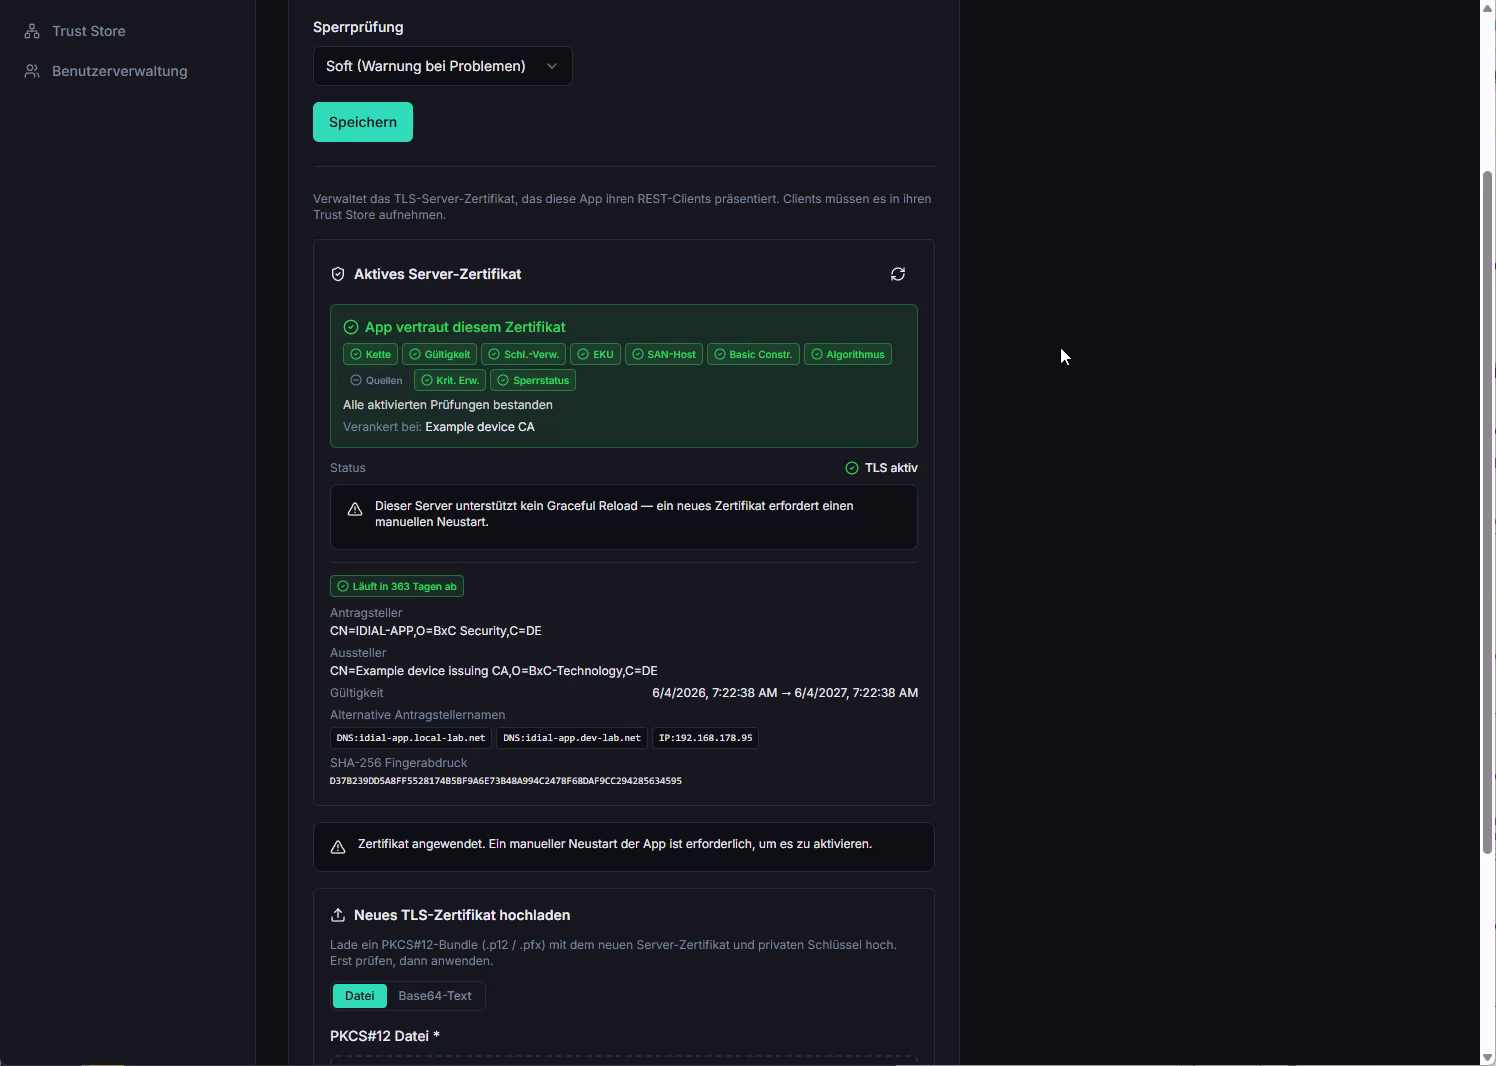
This server does not support graceful reload — applying a new certificate requires a manual restart of the app. Plan the timing of certificate changes accordingly.
Upload a New TLS Certificate
The Upload New TLS Certificate section allows you to upload a PKCS12 bundle (.p12 / .pfx) containing the new server certificate and private key. The upload is a two-step process: first verify, then apply.
The PKCS12 can be provided in two ways — select the appropriate tab:
- File — upload the file directly from the file system
- Base64 Text — paste the PKCS12 content as base64-encoded text
Then fill in the PKCS12 Password field and click Verify. The application analyzes the certificate and displays the validation result:
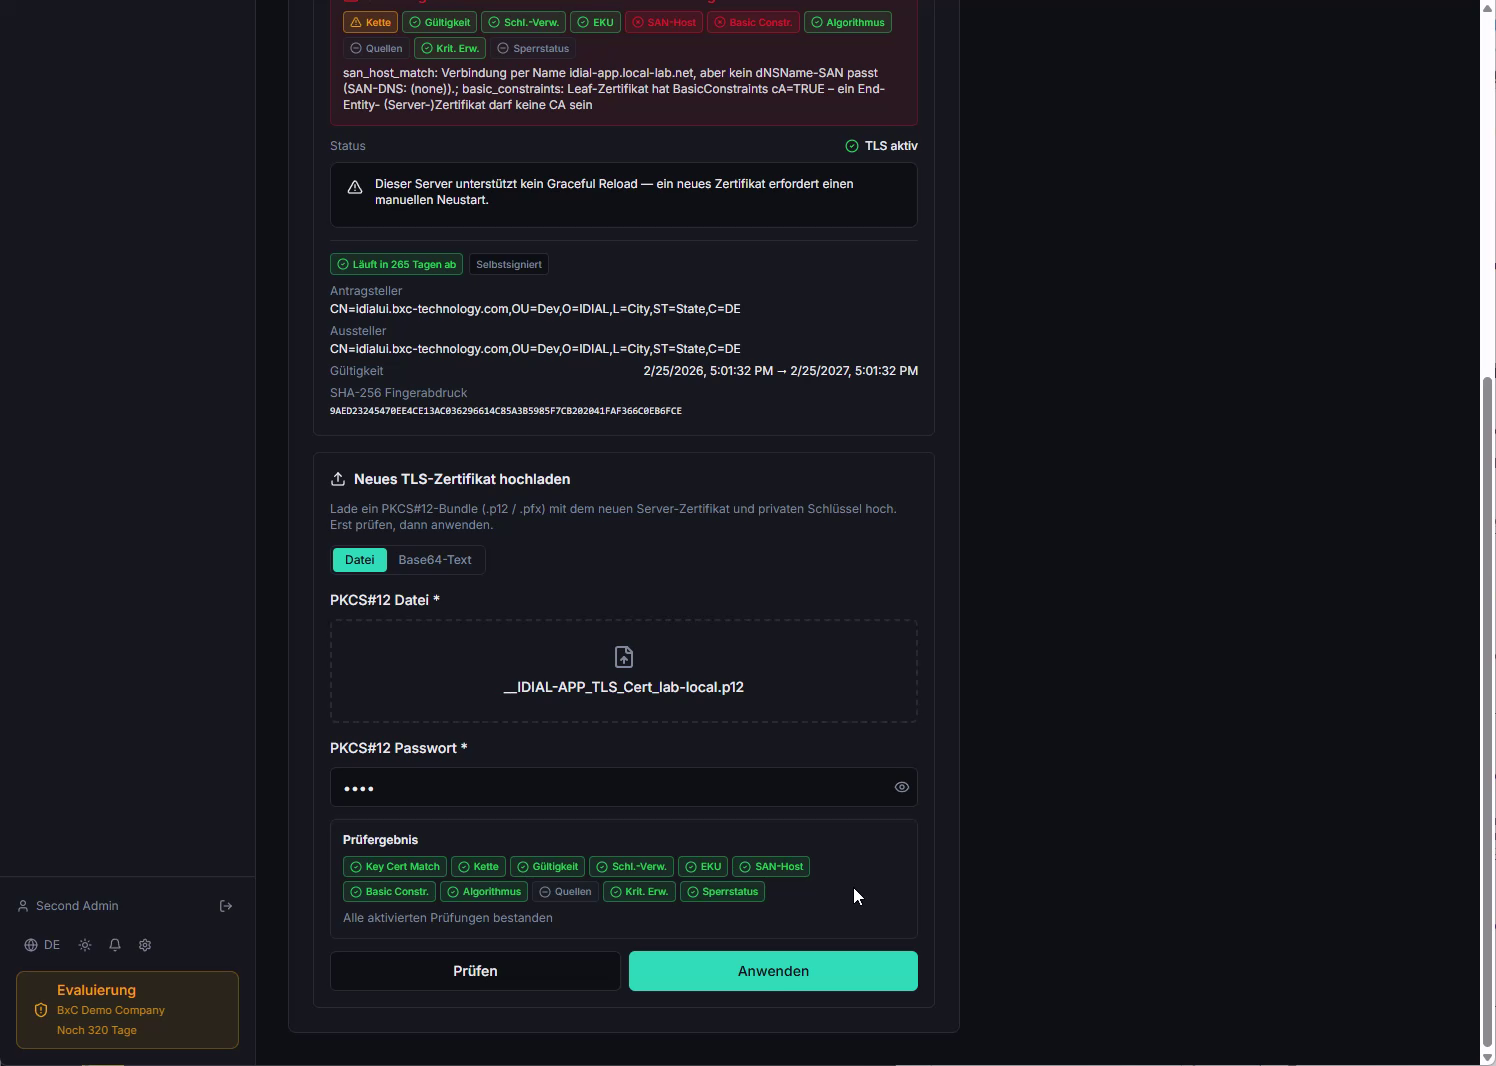
The following checks are performed:
| Check | Meaning |
|---|---|
| Key-Cert-Match | Private key and certificate belong together |
| Chain | The certificate chain is complete |
| Validity | The certificate is within its validity period |
| Key Usage | Key usage is set correctly |
| EKU | Extended Key Usage matches server authentication |
| SAN-Host | The configured public hostname is included as a SAN in the certificate |
| Basic Constraints | Basic constraints are set correctly |
| Algorithm | The signature algorithm is secure |
| Sources | Certificate sources could be resolved |
| Crit. Ext. | Critical extensions are known and correct |
| Revocation Status | The certificate is not revoked (according to the configured revocation check) |
When all checks pass, click Apply. The certificate is saved and activated immediately. A toast notification Server certificate applied confirms success.
The certificate must be issued by a CA stored in the IDIAL-APP Trust Store for the SAN-Host check to pass. Load the CA certificates into the Trust Store before uploading the server certificate (see Initialization guide, Step 5).
Logging
The Logging page controls the logging behavior of IDIAL-APP.
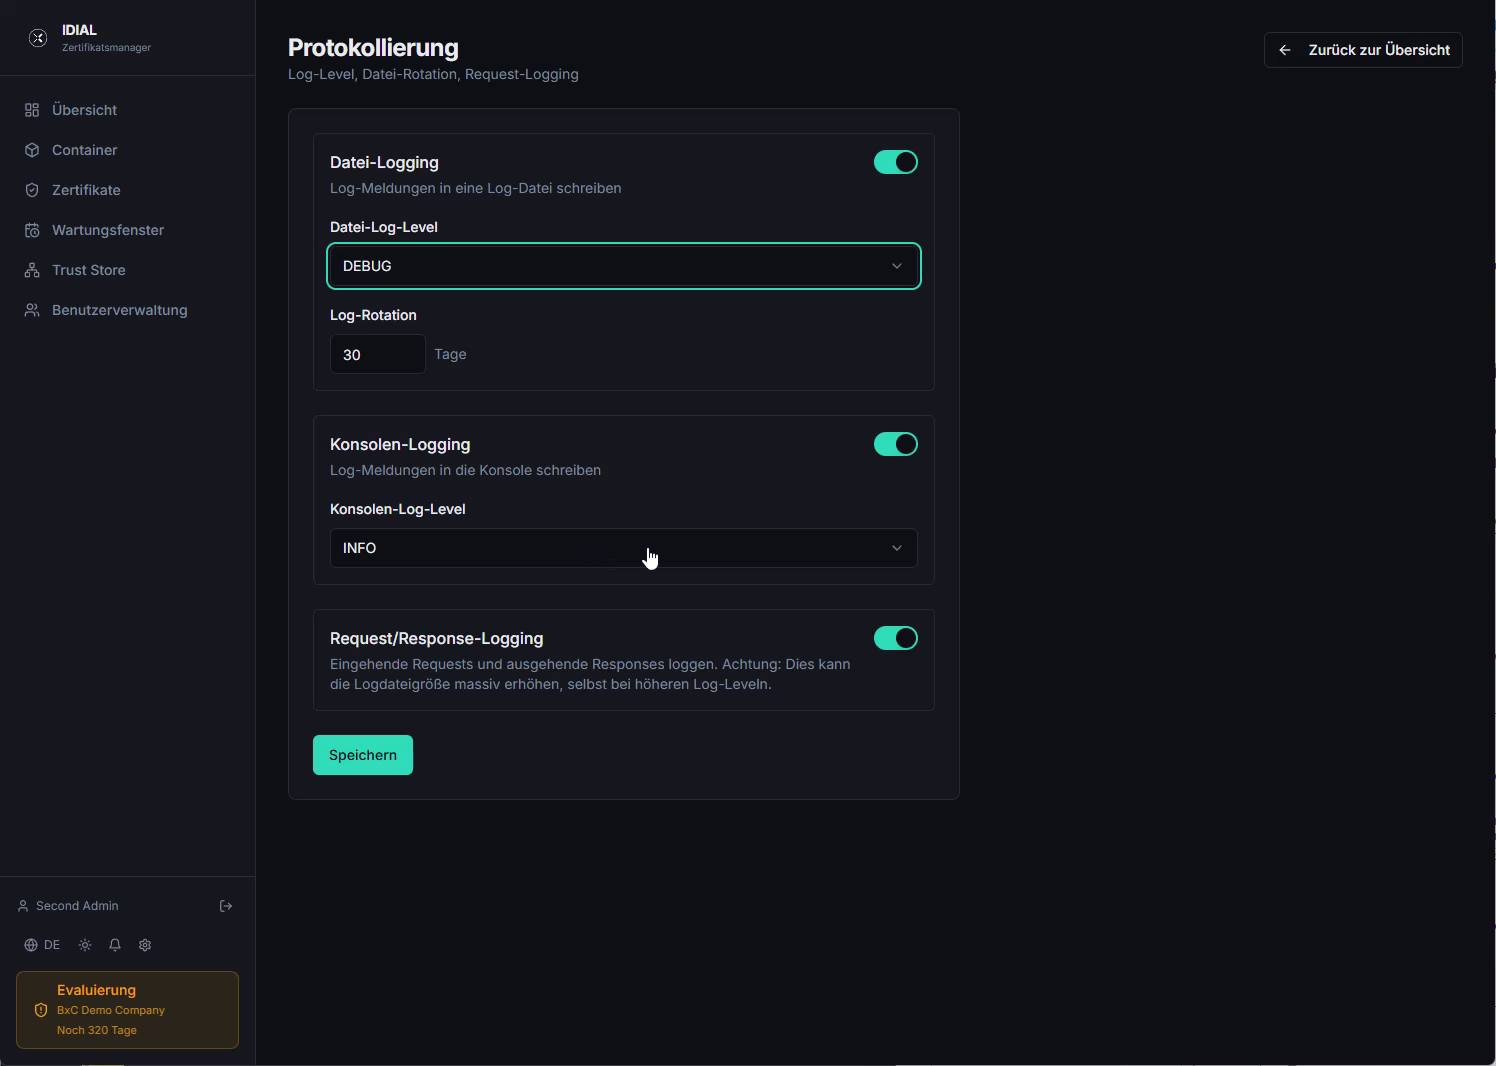
| Parameter | Description |
|---|---|
| File Logging | Enables or disables writing log messages to a file |
| File Log Level | Log detail level for the file log: TRACE, DEBUG, INFO, WARN, ERROR (most to least verbose) |
| Log Rotation | Number of days after which old log files are archived (default: 30 days) |
| Console Logging | Enables or disables writing log messages to the container console |
| Console Log Level | Log detail level for the console log |
| Request/Response Logging | Logs all incoming REST requests and outgoing responses. Warning: can massively increase log file size, even at higher log levels |
Changes are applied by clicking Save.
For production use, we recommend File Log Level: INFO and Console Log Level: INFO. The DEBUG level generates very large log files and should only be used for troubleshooting. The TRACE level provides maximum detail for in-depth analysis.
IDIAL Container Communication
The IDIAL Container Communication page configures timeout behavior and logging for communication between IDIAL-APP and the connected IDIAL containers.

| Parameter | Description |
|---|---|
| Request Timeout (seconds) | Timeout for all IDIAL container requests except the connection test (1–300 s, default: 30 s) |
| Connection Test Timeout (seconds) | Timeout for the systeminfo connection test, which is called frequently to check the online status of containers (1–60 s, default: 10 s) |
| IDIAL Request/Response Logging | Logs all HTTP traffic to and from IDIAL containers. Increases log volume significantly |
Changes are applied by clicking Save.
OpenID Connect (OIDC)
The OpenID Connect (OIDC) page allows connecting an external identity provider (IdP) for single sign-on. Users can then authenticate via the IdP and, upon successful login, gain access to IDIAL-APP.
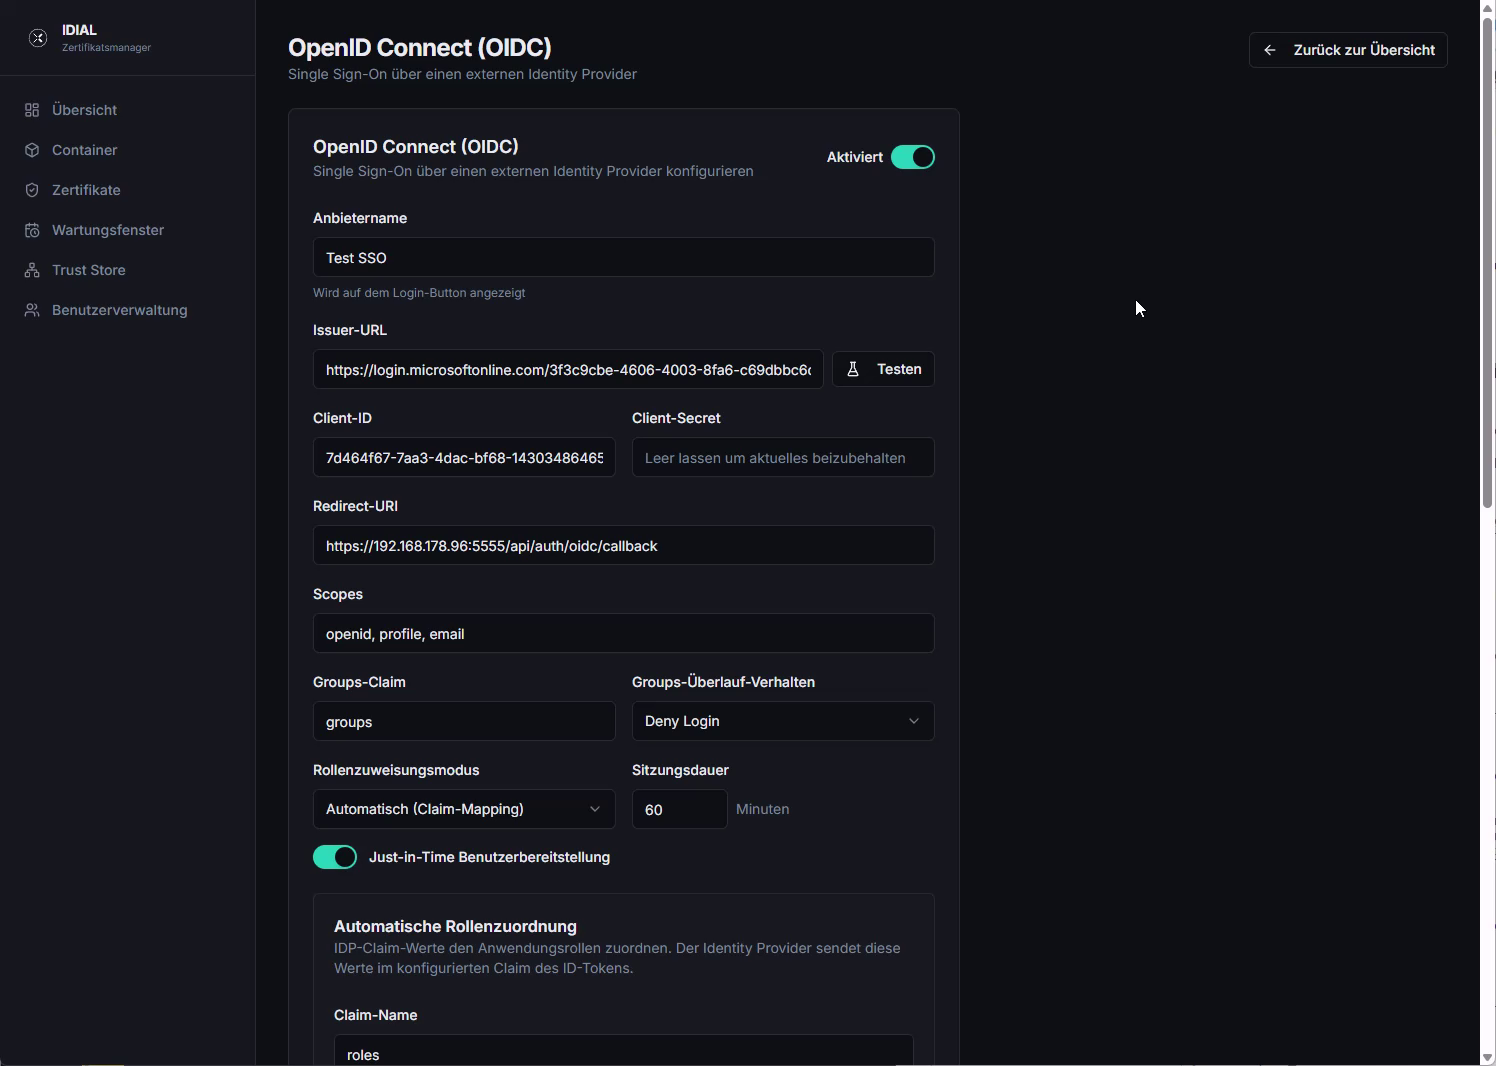
Basic Configuration
First, enable the Activated toggle in the top-right corner. Then fill in the following fields:
| Field | Description |
|---|---|
| Provider Name | Display name of the identity provider — shown as the label on the SSO button on the login page |
| Issuer URL | Discovery endpoint of the IdP (e.g. https://login.microsoftonline.com/<tenant>/v2.0) — use Test to verify reachability |
| Client ID | The client ID of this application from the IdP registration |
| Client Secret | The application's client secret — leave empty to keep the currently saved secret |
| Redirect URI | Automatically generated and read-only — must be registered as a redirect URI in the IdP application registration |
| Scopes | OAuth2 scopes requested during login (default: openid, profile, email) |
| Groups Claim | Name of the claim in the ID token that contains group memberships (default: groups) |
| Groups Overflow Behavior | Behavior when the groups claim contains too many entries: Deny Login |
| Session Duration | Validity period of an OIDC session in minutes (default: 60) |
| Just-in-Time User Provisioning | When enabled, user accounts are automatically created in IDIAL-APP on first login |
Role Assignment Mode
The Role Assignment Mode determines how IDIAL-APP roles are assigned to authenticated users:
-
Manual — Roles are managed exclusively in IDIAL-APP's user management. The IdP provides no role information. Use this mode when role management is handled centrally within IDIAL-APP.
-
Automatic (Claim Mapping) — Roles are assigned automatically based on claims in the IdP's ID token. This mode is recommended when role information is already maintained in the IdP.
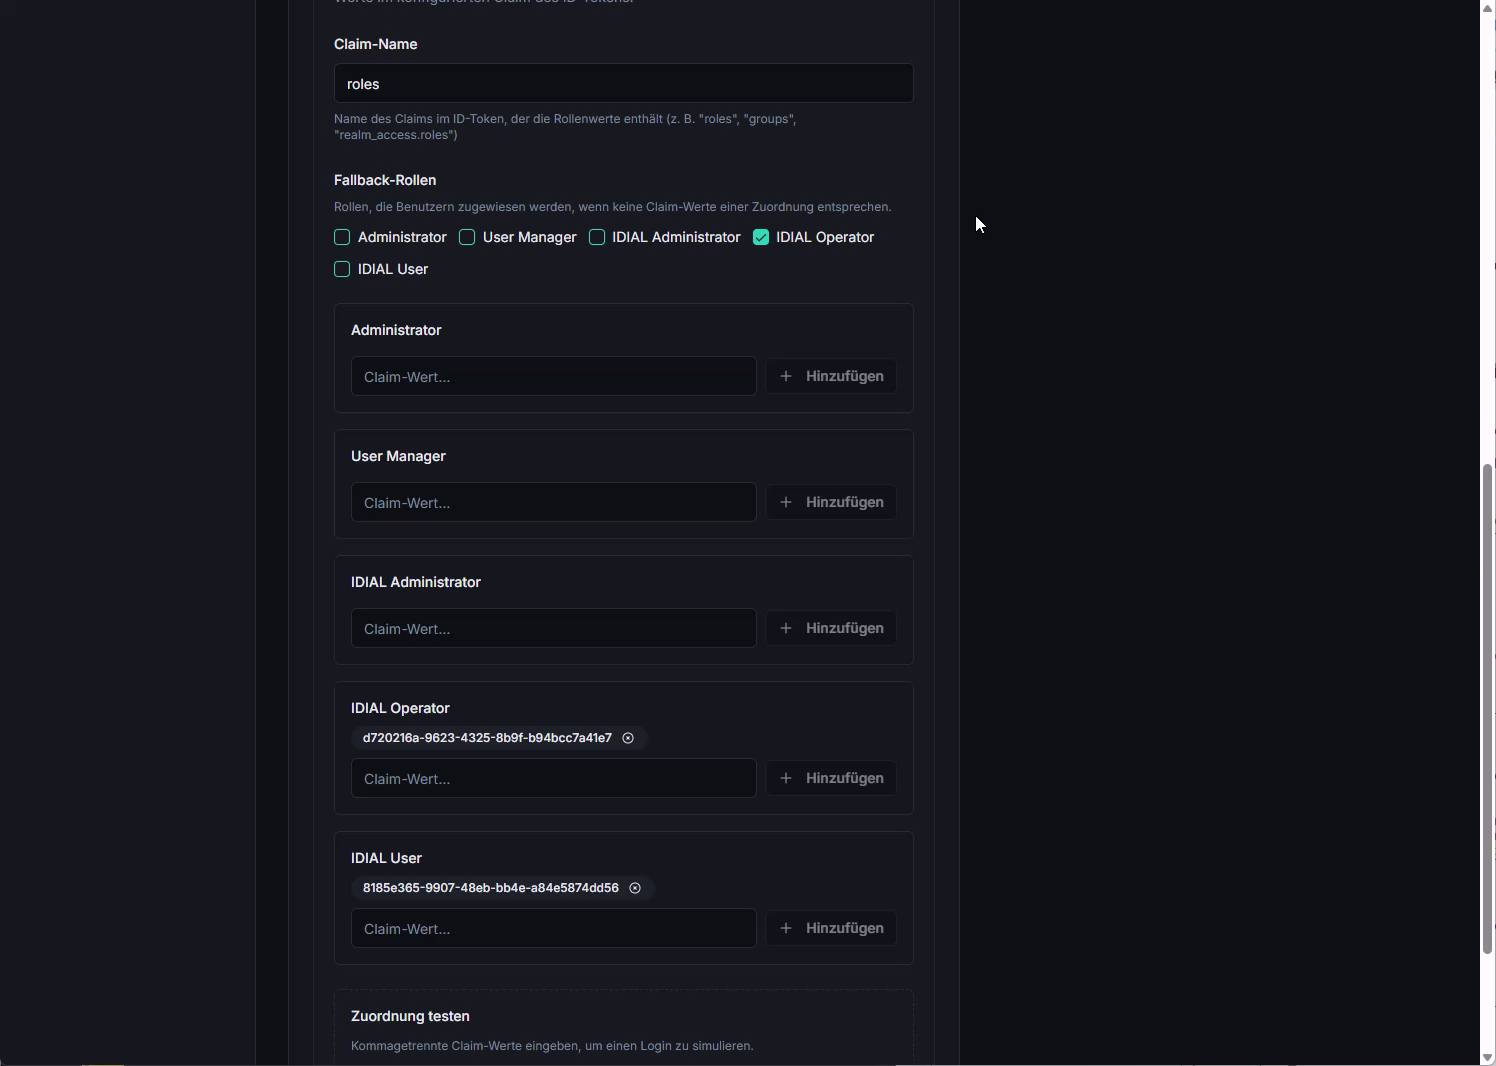
Automatic Role Mapping
When Automatic (Claim Mapping) mode is active, the Automatic Role Assignment section appears:
| Field | Description |
|---|---|
| Claim Name | Name of the claim in the ID token that contains the role values (e.g. roles, groups, team_access.roles) |
| Fallback Roles | Roles assigned to users when no claim value matches a configured mapping. Useful when all authenticated users should receive at least one base role (e.g. IDIAL User). |
Below the fallback roles, separate input fields are shown for each IDIAL-APP role (Administrator, User Manager, IDIAL Administrator, IDIAL Operator, IDIAL User). Enter the claim values that the IdP sends for each role (e.g. a group UUID or role name). Use + Add to enter multiple claim values per role.
Test Mapping
At the bottom of the page, the Test Mapping section allows you to enter comma-separated claim values to simulate a login and verify the resulting role assignment — without performing an actual sign-in.
Obtain the OIDC configuration from your identity provider's documentation and the application registration settings. The redirect URI and issuer URL must exactly match the values in the IdP registration.