Beckhoff TwinCAT 3 – OPC UA Server Configuration
This guide describes the configuration of an OPC UA Server on a Beckhoff TwinCAT 3 system (firmware version 4042) for integration with IDIAL.
The configuration covers creating a new TwinCAT project, license management, CPU configuration, adding a PLC, and fully configuring the OPC UA Server using the TwinCAT OPC UA Configurator.
Prerequisites – the following software must be installed:
- TwinCAT 3 (TcXaeShell)
- TF6100 OPC UA Configurator
- TF6100 OPC UA Server
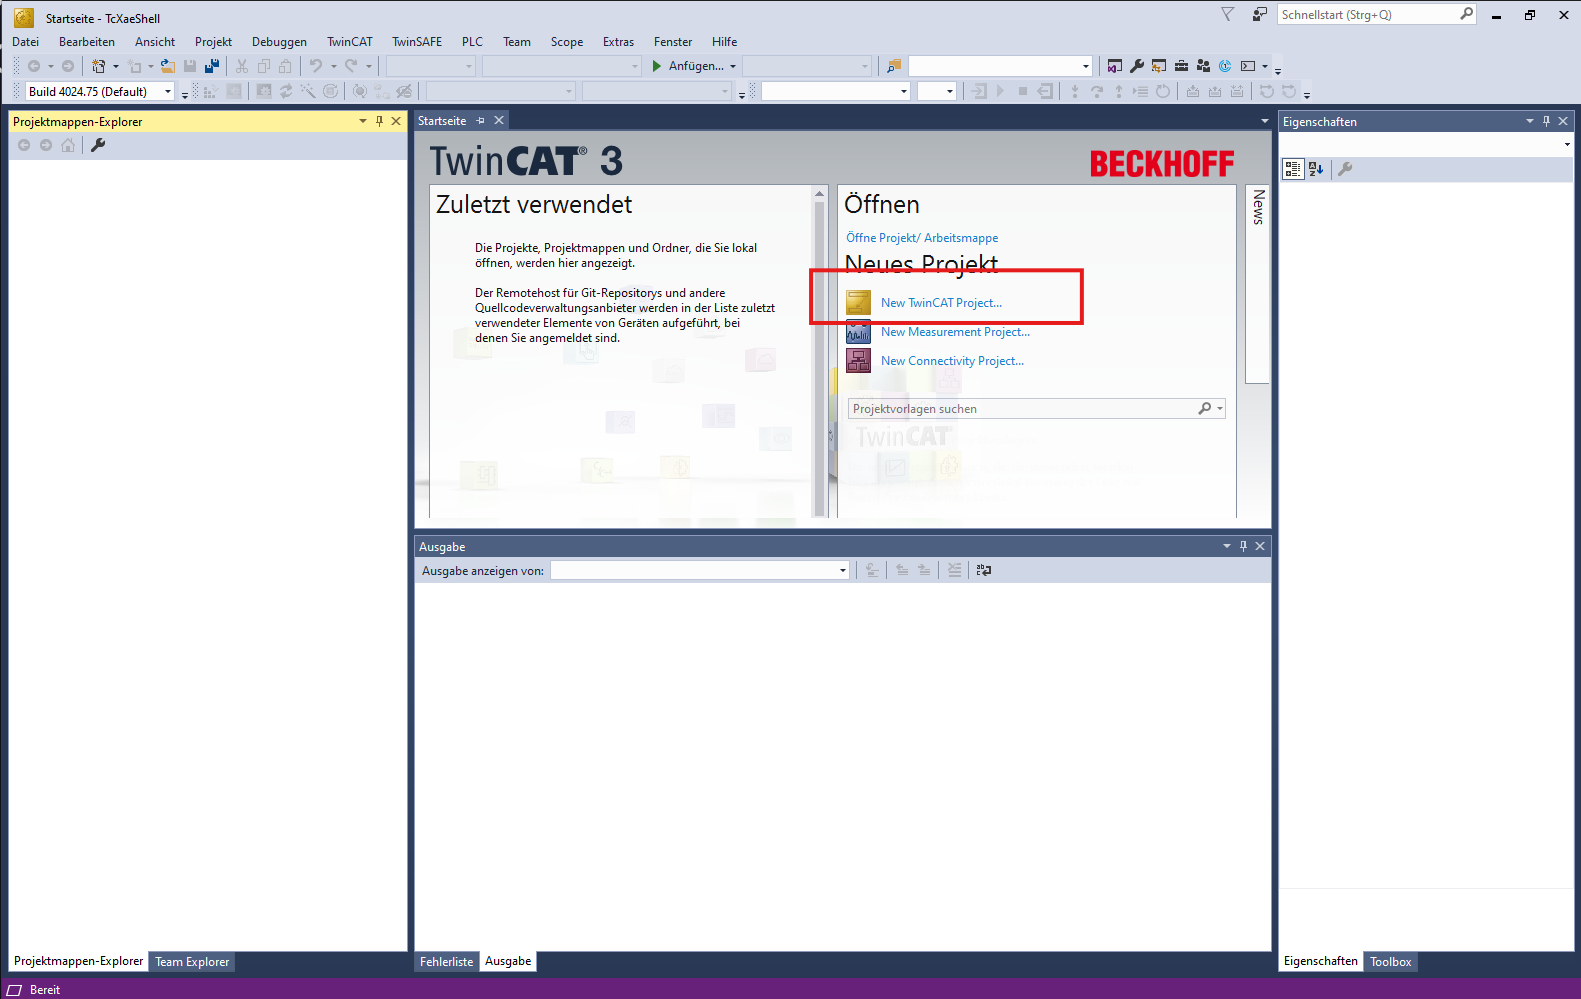
1. Create a Project
Open TcXaeShell. On the start page under New Project, click New TwinCAT Project....
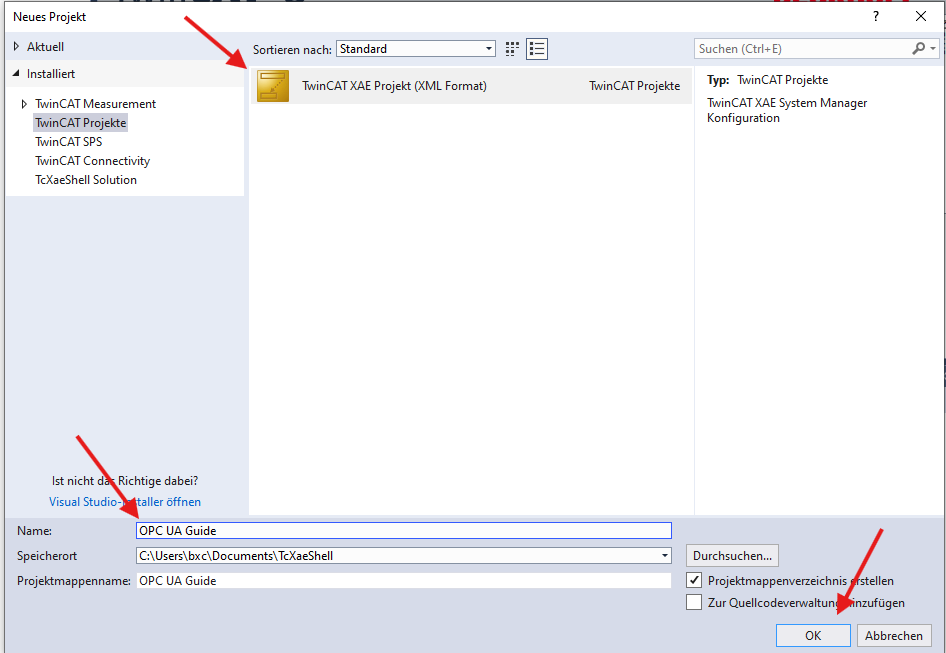
In the New Project dialog, select TwinCAT XAE Project (XML Format) under TwinCAT Projects, enter a project name, and confirm with OK.
2. Configure License and CPU
2.1 Activate the License
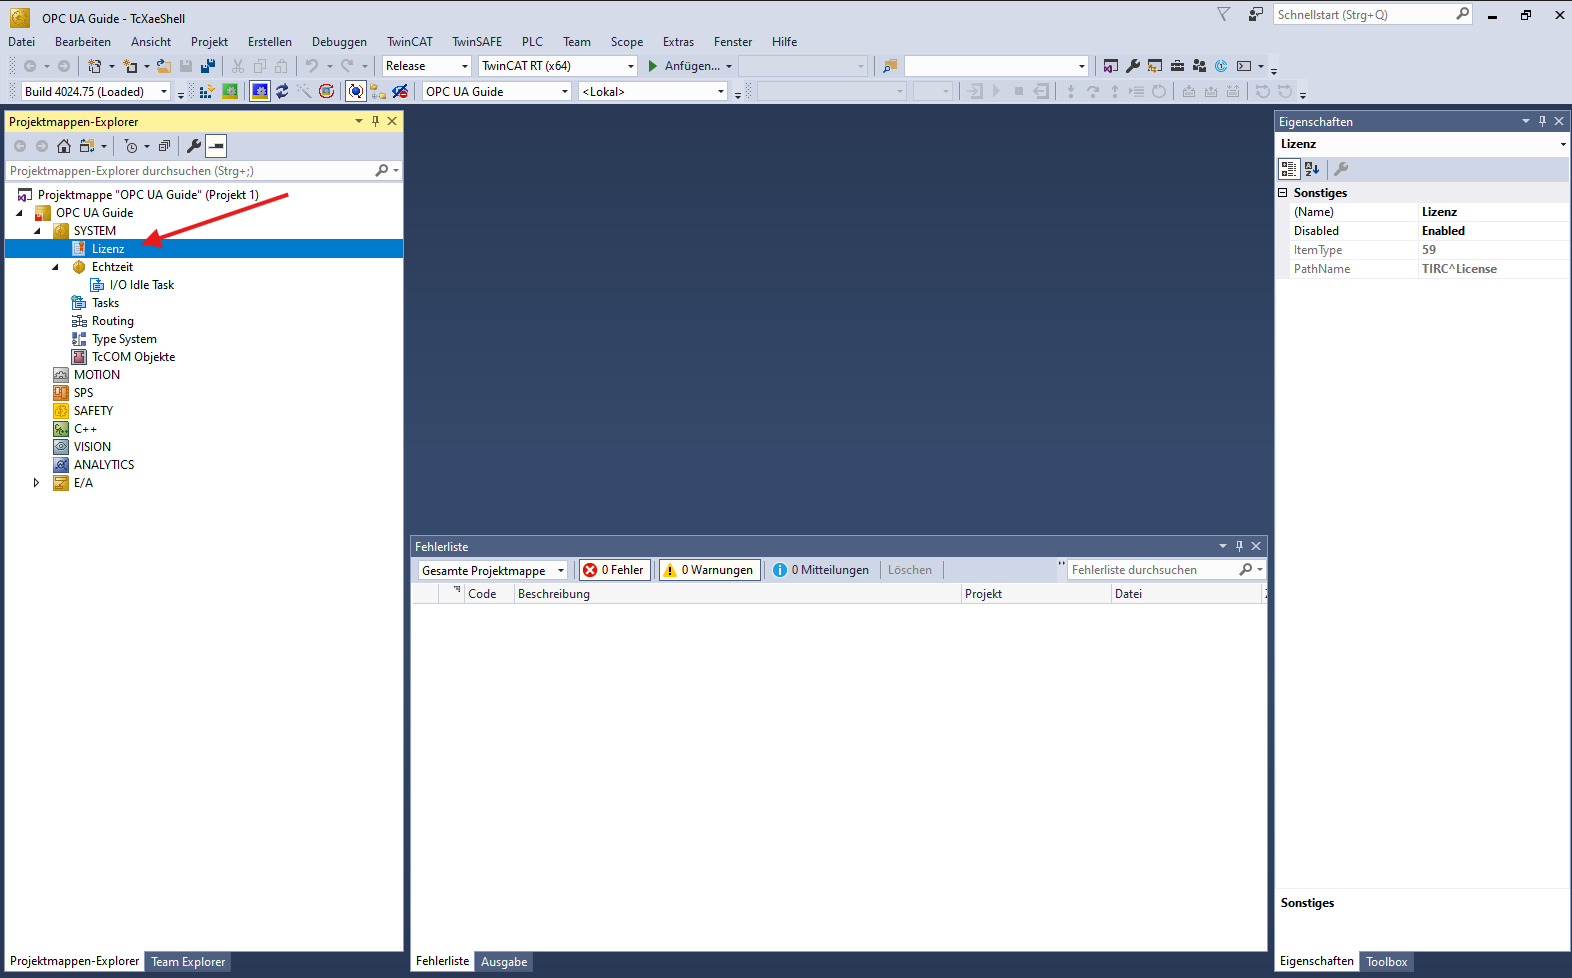
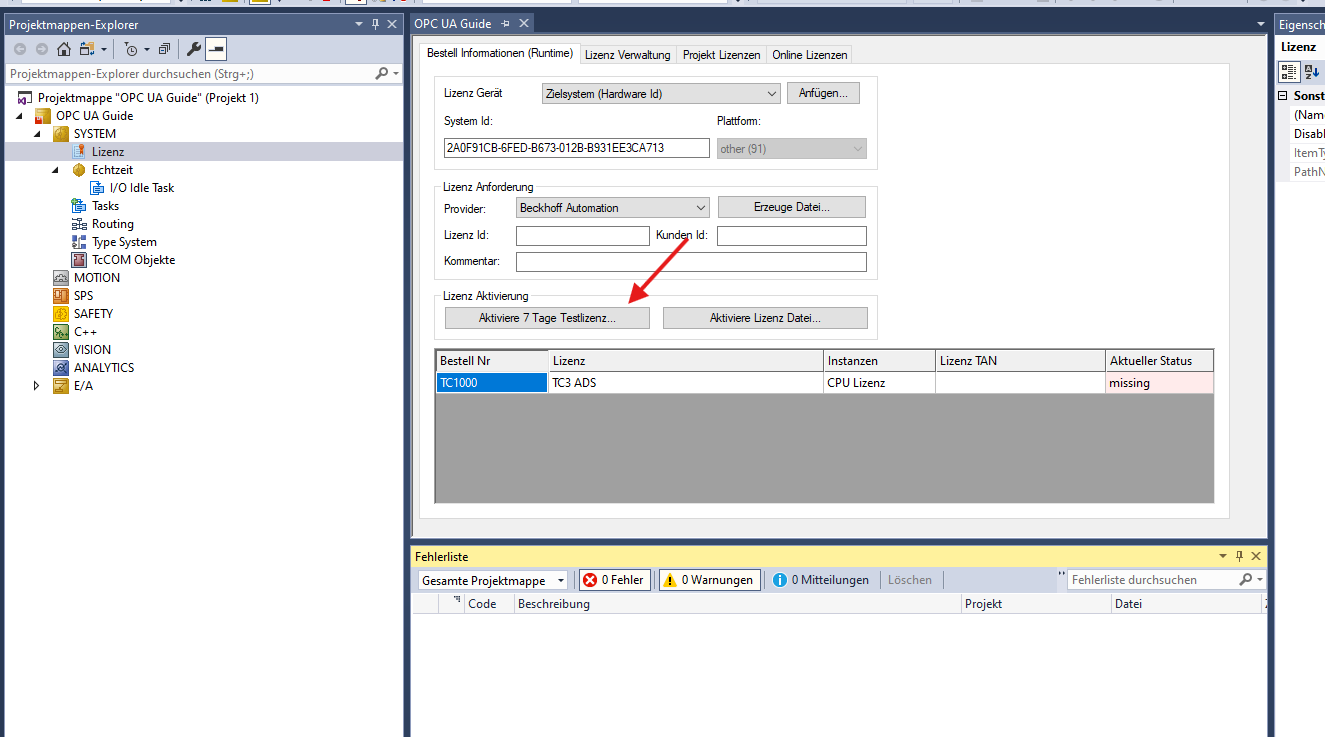
In the Solution Explorer, expand the SYSTEM node and click License to open the license management view.
Switch to the Order Information (Runtime) tab. Click Activate 7 Day Trial License... to generate a trial license for TC1000 TC3 ADS.
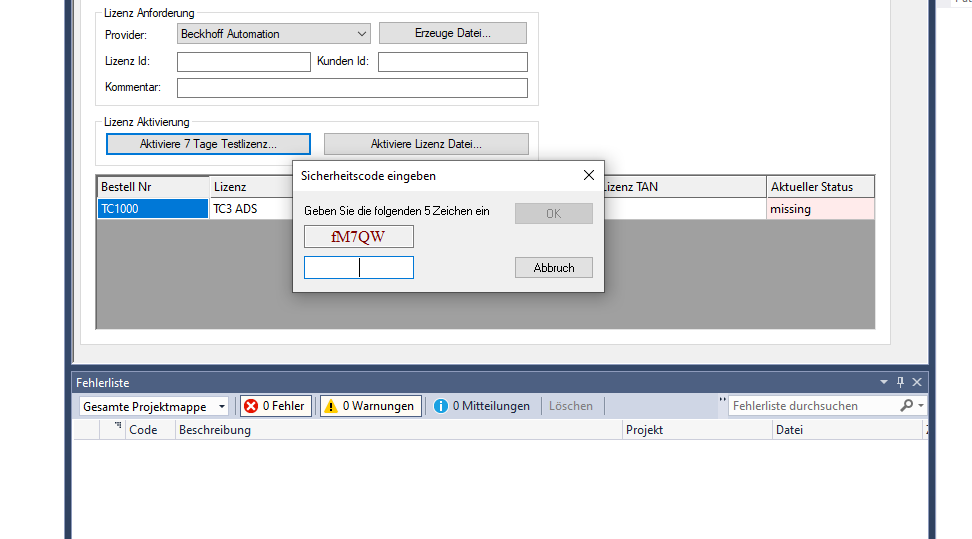
A dialog will appear prompting you to enter a security code (captcha). Enter the displayed code and confirm with OK.
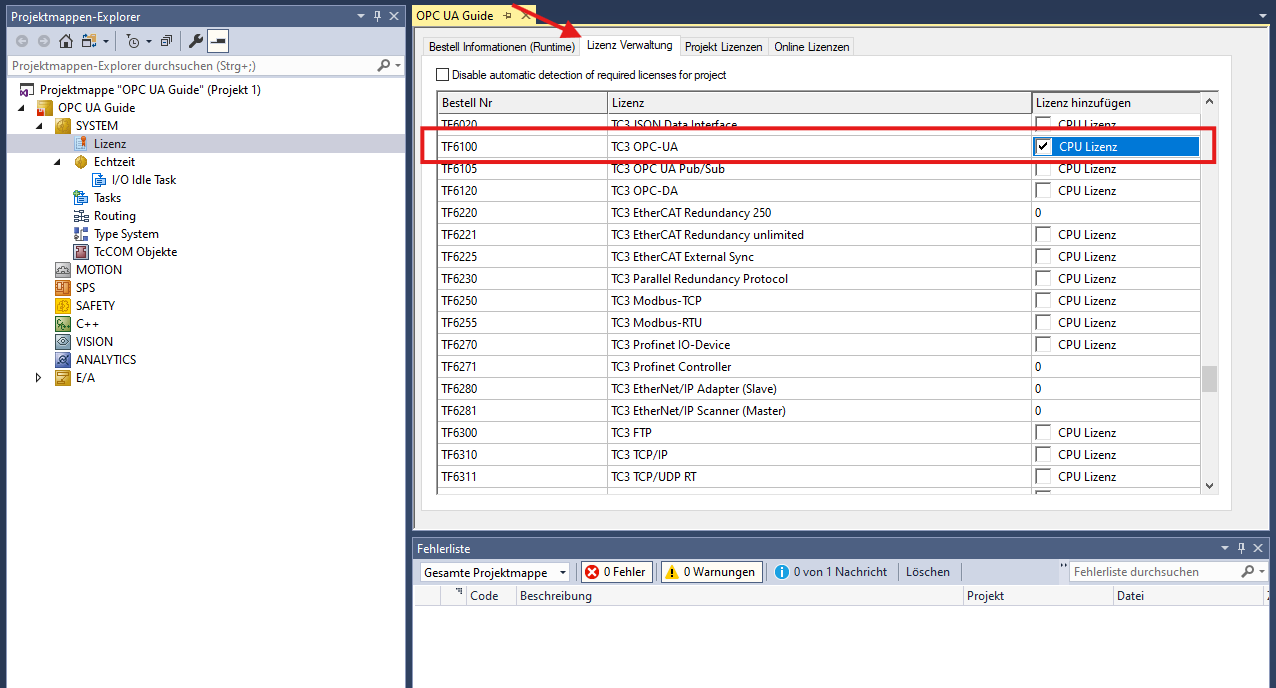
Switch to the License Management tab. Check the checkbox in the Add License column for the entry TF6100 – TC3 OPC-UA, then click Activate 7 Day Trial License... again to generate a trial license for this module as well.
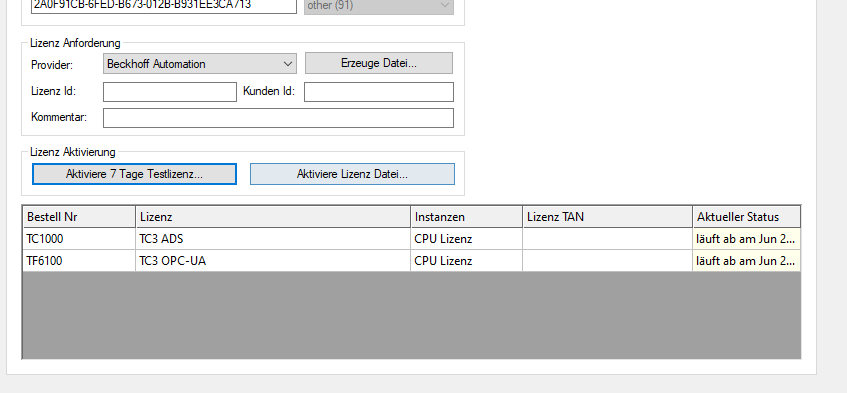
After activation, both licenses (TC1000 and TF6100) will appear in the list with the status expires on....
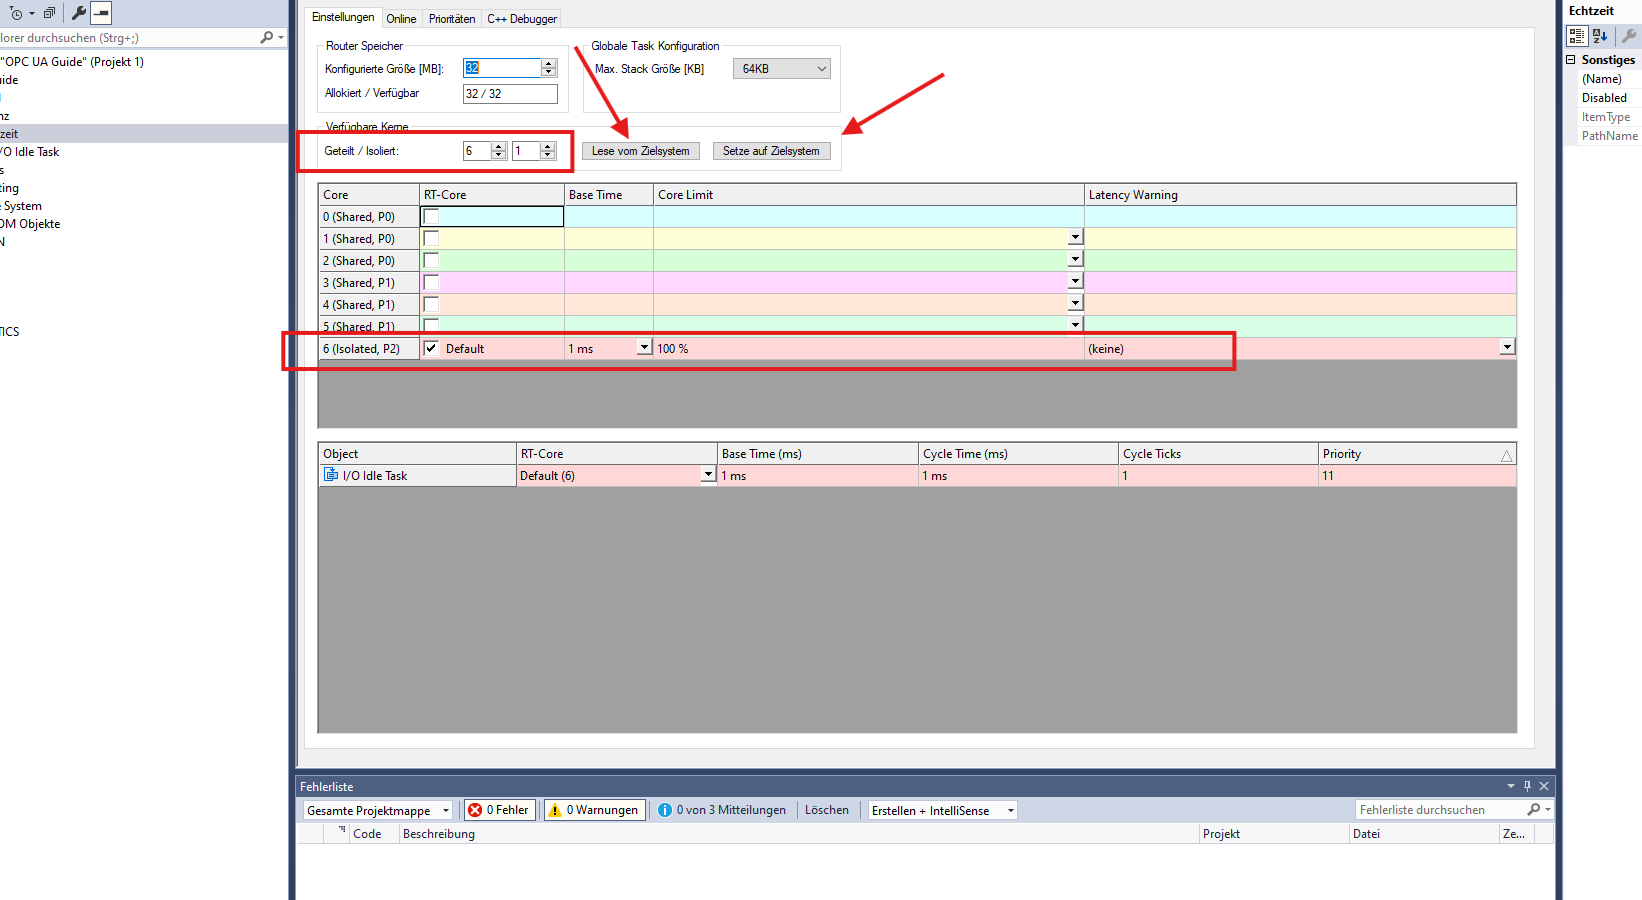
2.2 Real-Time / CPU Configuration
In the project tree, expand SYSTEM and open Real-Time. Click Read from Target to detect the available CPU cores. Set the desired number of Isolated cores and apply the setting with Set on Target.
The configuration shown in the screenshot (1 isolated core) was chosen for the demo system used in this guide. The optimal number of isolated cores depends on the hardware and the requirements of the specific application and may vary from system to system.
Save the project before selecting "Set on Target". This operation may trigger a reboot of the local system.
3. Set Up the PLC
In the Solution Explorer, right-click PLC and select Add New Item....

In the dialog, select Standard PLC Project. The project will be created — this may take a few minutes.
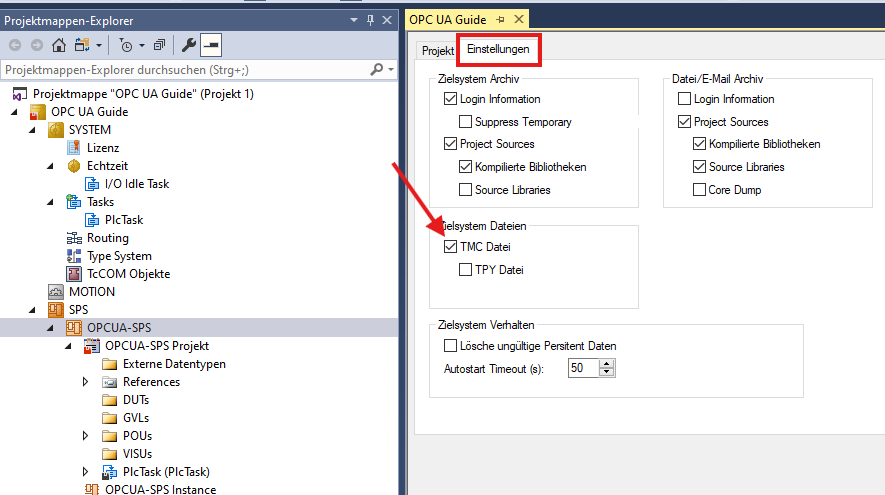
Enable the TMC File
Select the newly created PLC project in the project tree and open the Settings tab. Ensure that the TMC File option is checked under Target System Files.
The TMC file contains the symbol and type information of the PLC project and is required for communication interfaces such as ADS, OPC UA, and HMI.
This option must be enabled so that the OPC UA Server can correctly access the PLC symbols.
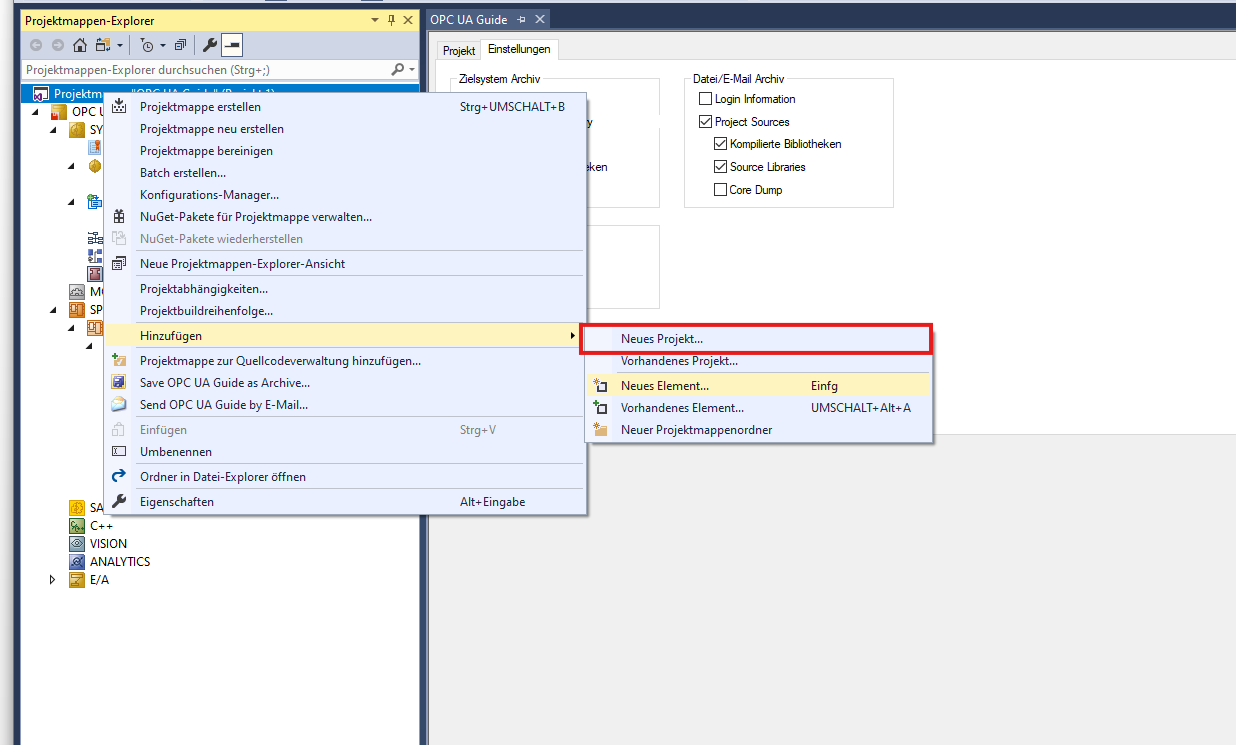
4. Add a Connectivity Project
To make an OPC UA Server available, a TwinCAT Connectivity Project must be added to the solution.
Right-click the solution (top-level node in the Solution Explorer) and select Add → New Project....
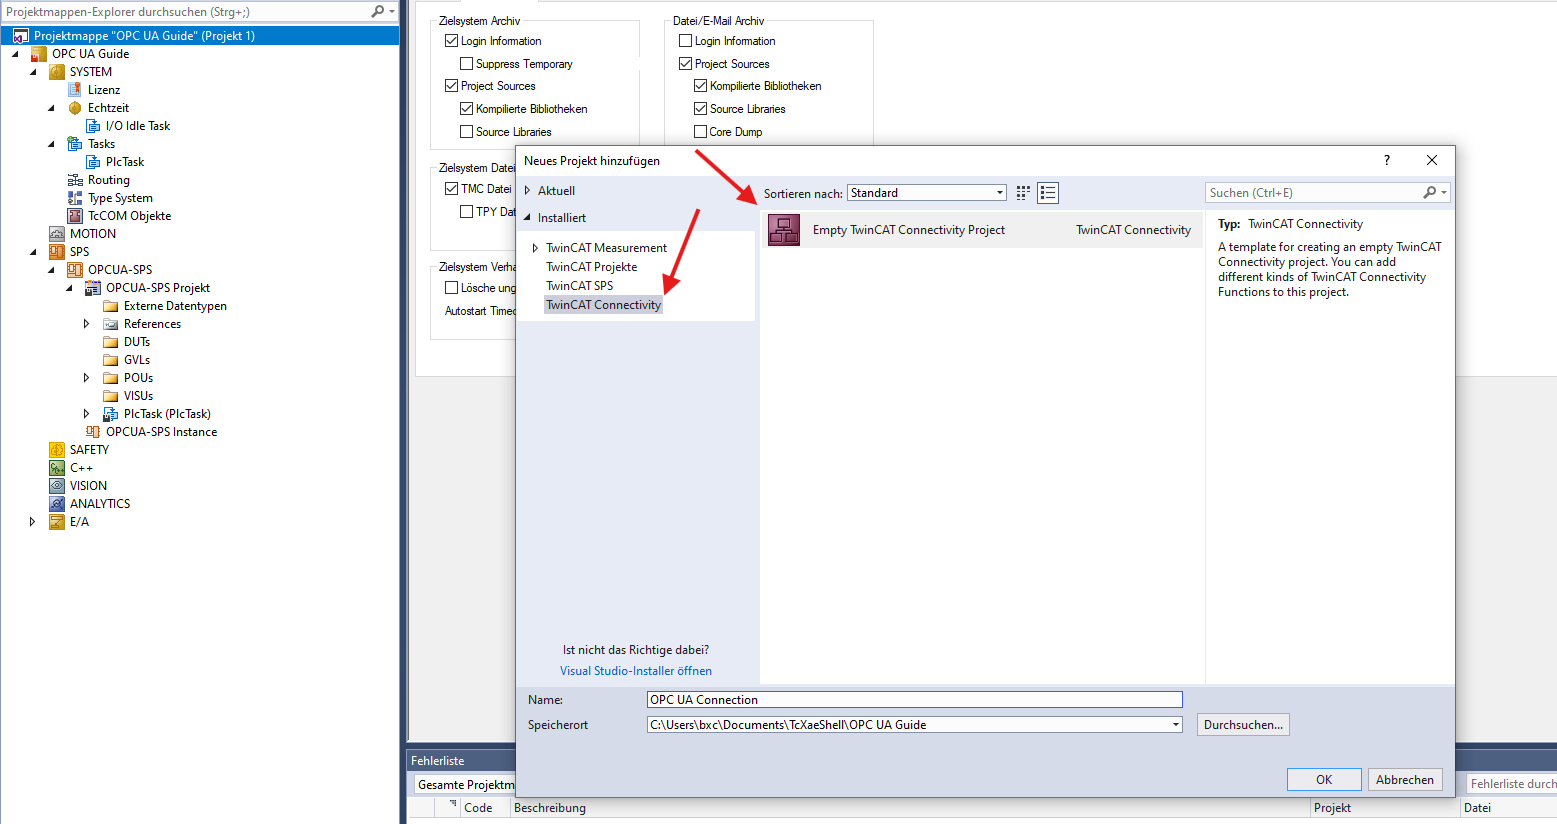
In the dialog, select Empty TwinCAT Connectivity Project under TwinCAT Connectivity, enter a name, and confirm with OK.
4.1 Add an OPC UA Server
Right-click the newly created Connectivity Project in the Solution Explorer and select Add New Item.... Choose TwinCAT OPC UA Server Project and confirm.
4.2 Add the PLC to the OPC UA Server
The PLC project can now be added to the OPC UA Server. The ADS port and the AMS NetID are required for this.
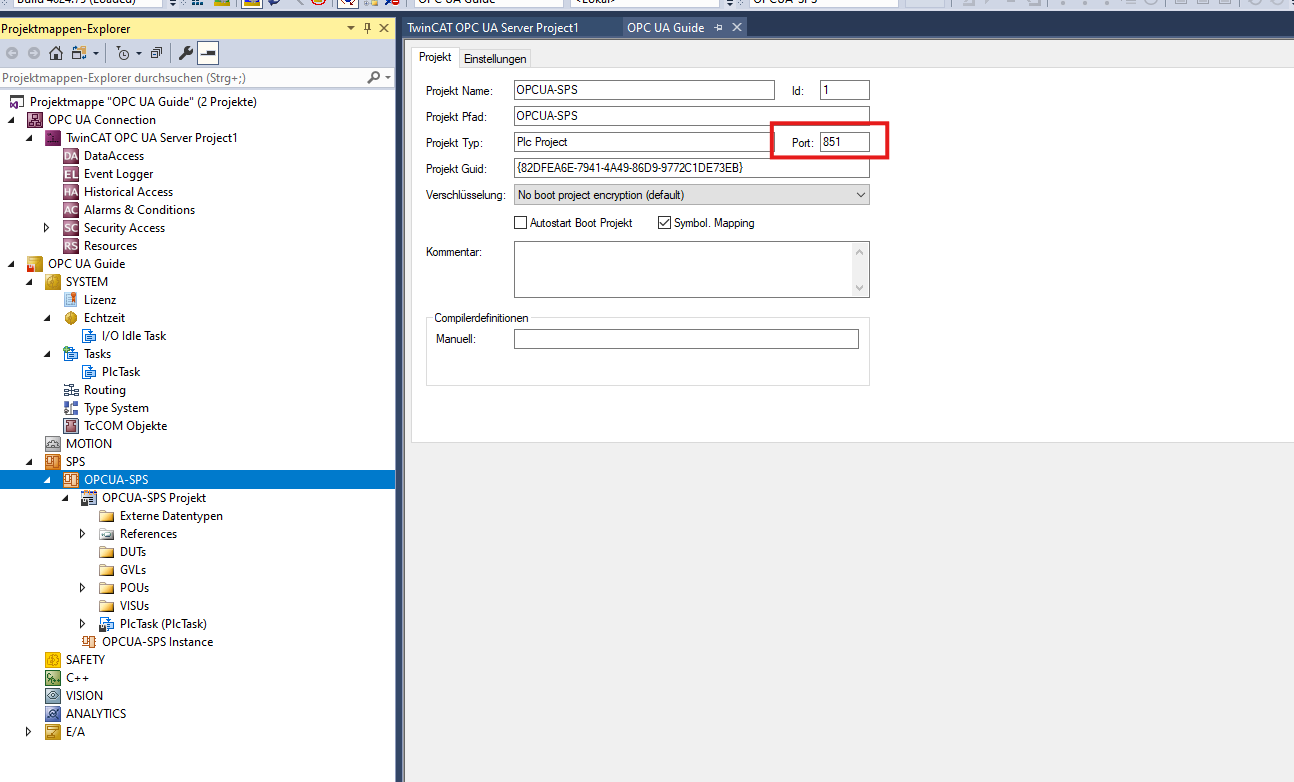
Determine the ADS port
The ADS port can be found in the project properties of the PLC project under the OPC UA Server. Click the PLC project under DataAccess in the project tree. The port is shown in the properties panel under Port (default: 851).
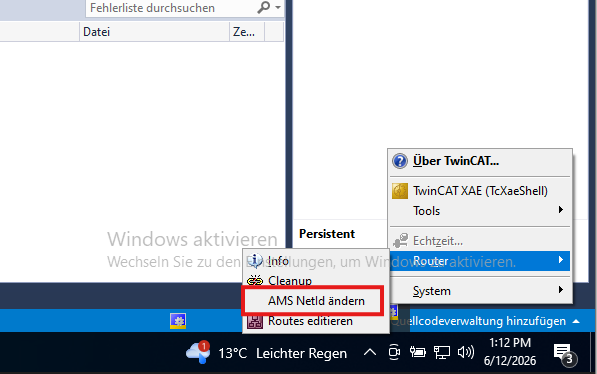
Determine the AMS NetID
The AMS NetID can be read from the Windows system tray. Right-click the blue TwinCAT icon in the taskbar and select Router → Change AMS NetID.
The AMS Router dialog shows the AMS Net ID of the local system. Note this value.

Add the PLC project
Right-click DataAccess (under the TwinCAT OPC UA Server project) in the Solution Explorer and select Add Device Type. In the Create Device Type dialog, enter the ADS Port and AMS Net ID and click Create.
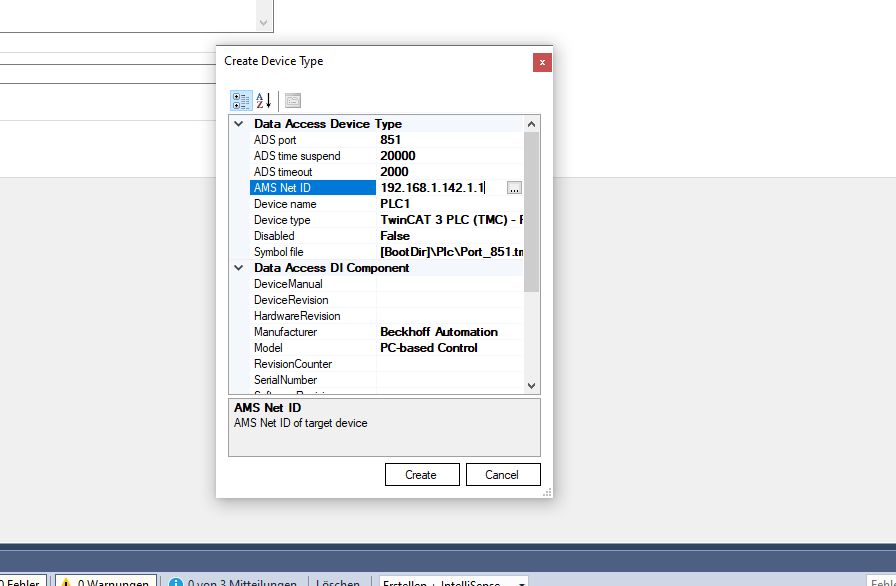
The PLC will then appear as a device under DataAccess in the OPC UA Server project.
5. Configure the OPC UA Server
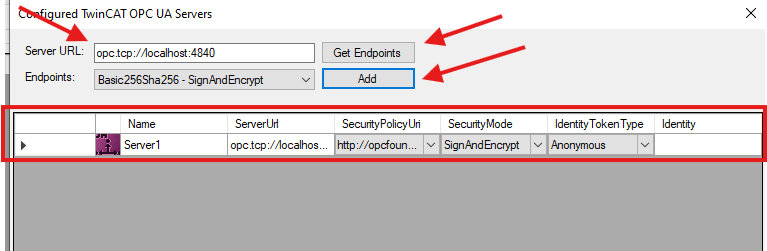
5.1 Configure the Endpoint
Open the TwinCAT OPC UA Configurator. Click Edit and enter the Server URL (for local execution: opc.tcp://localhost:4840). Select Get Endpoints and add the desired endpoint using Add.
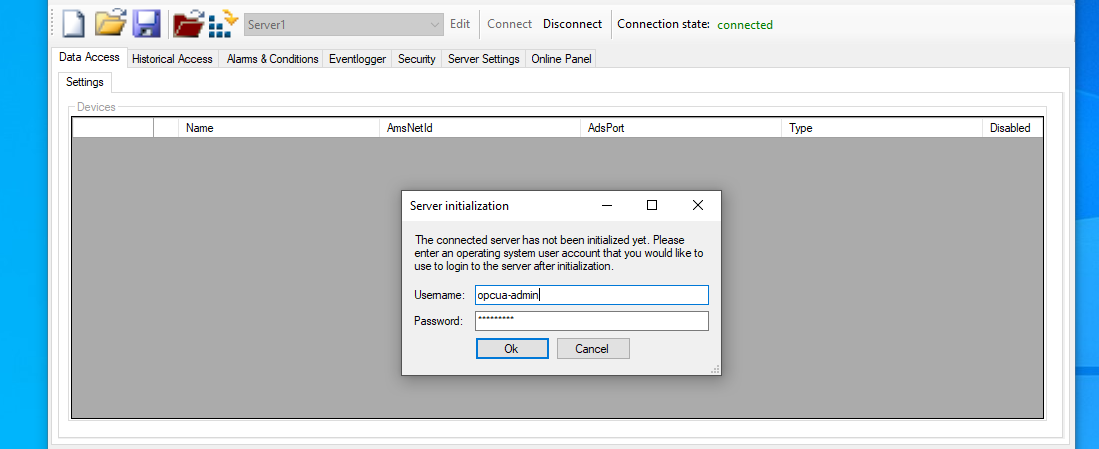
Close the window and click Connect. Since the server has not been initialized yet, a Server initialization dialog will appear. Enter a username and password for the OPC UA user account. If the user does not exist on the system, it will be created automatically.
5.2 Write the Configuration to the PLC
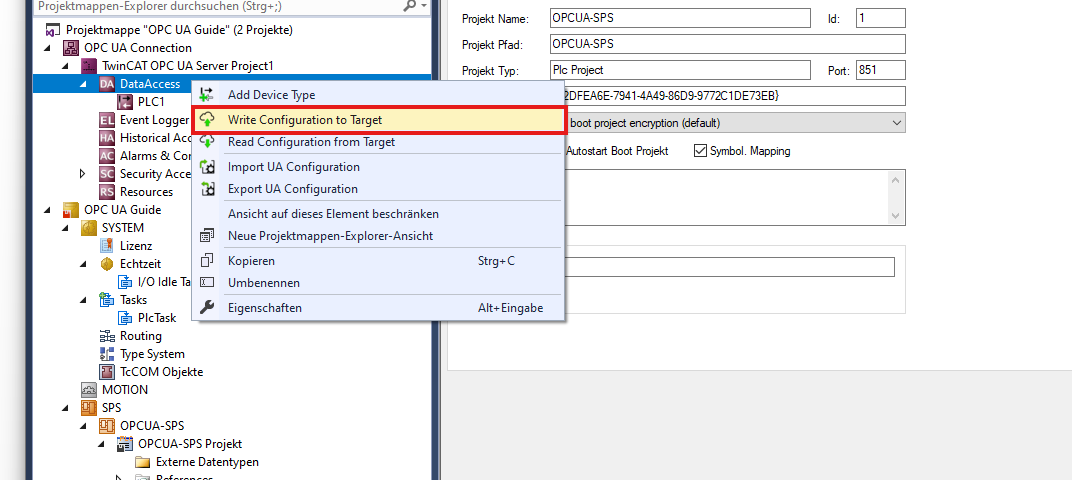
Right-click DataAccess in the Solution Explorer and select Write Configuration to Target. The OPC UA Server will restart and the configuration will become active.
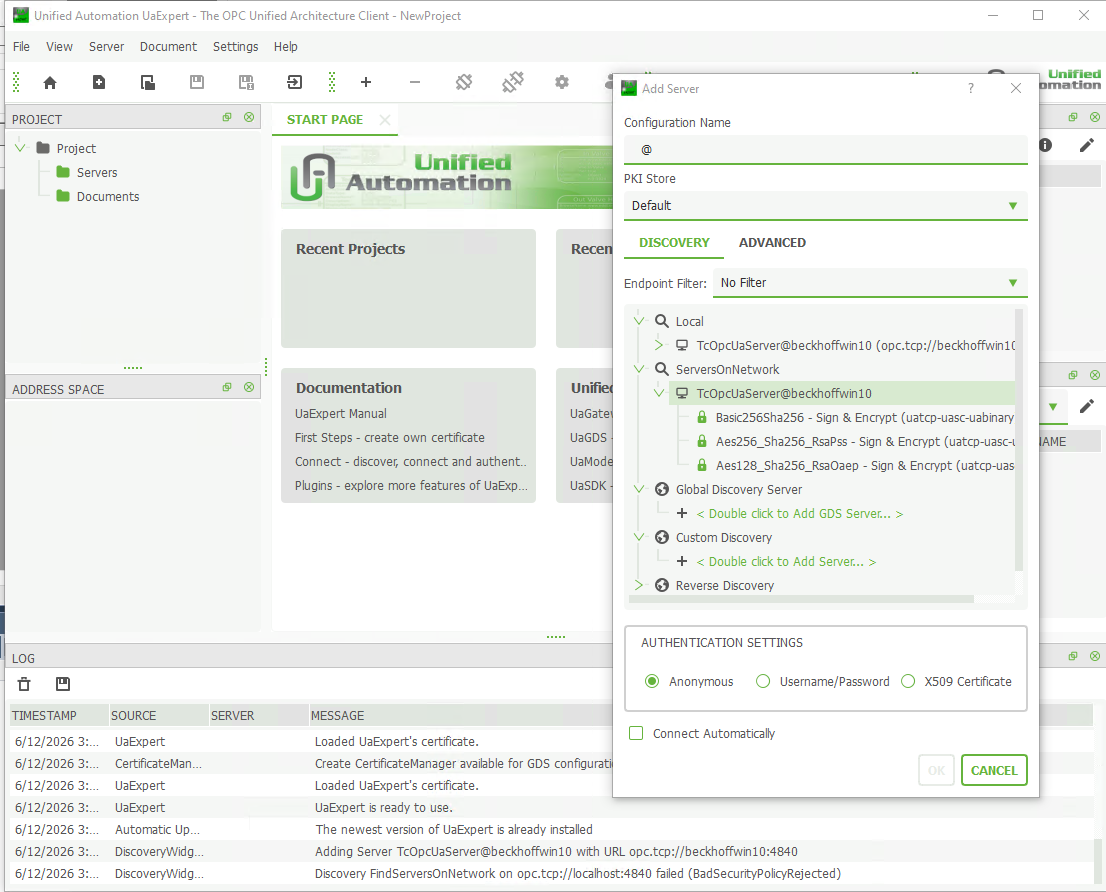
6. Verify the Connection
After the OPC UA Server restarts, the connection can be verified using an OPC UA client such as UaExpert or ListNet Automation. Connect to the configured endpoint and confirm that the PLC symbols are visible in the address space.