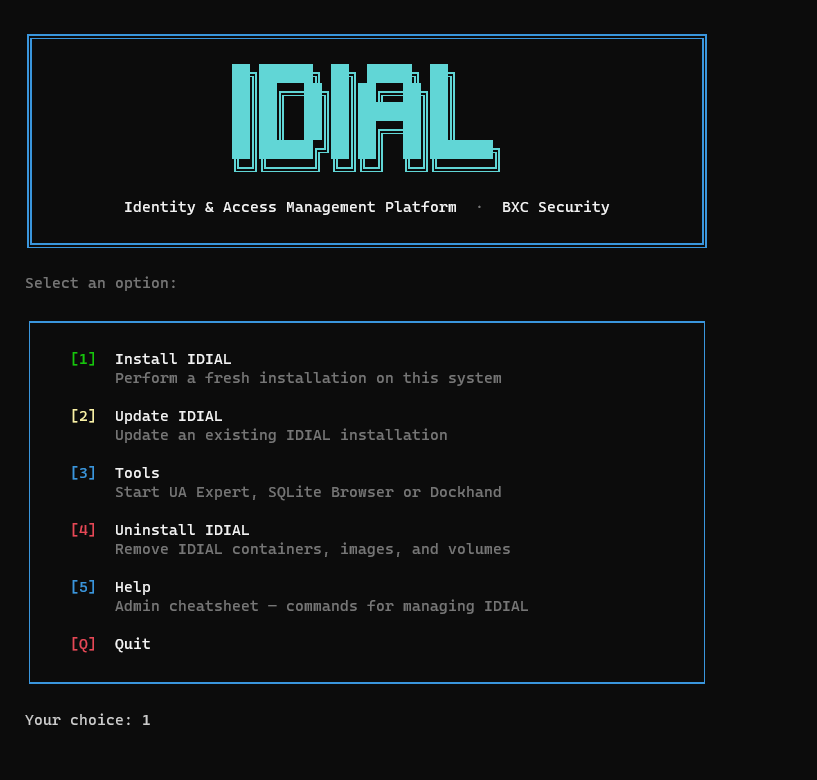
IDIAL Installation Guide – Windows
System Requirements
Before deploying IDIAL as a Docker container on a Windows-based system, ensure the following requirements are met:
- Python 3.x
- At least 35 GB of free storage
- Native/bare-metal installation of Windows or Windows Server (no virtual machine)
- Docker Desktop (latest version)
Installation
Step 1: Install Python
The deployment script requires Python 3.x to be installed on the system.
Download Python 3.x from the official website: python.org/downloads
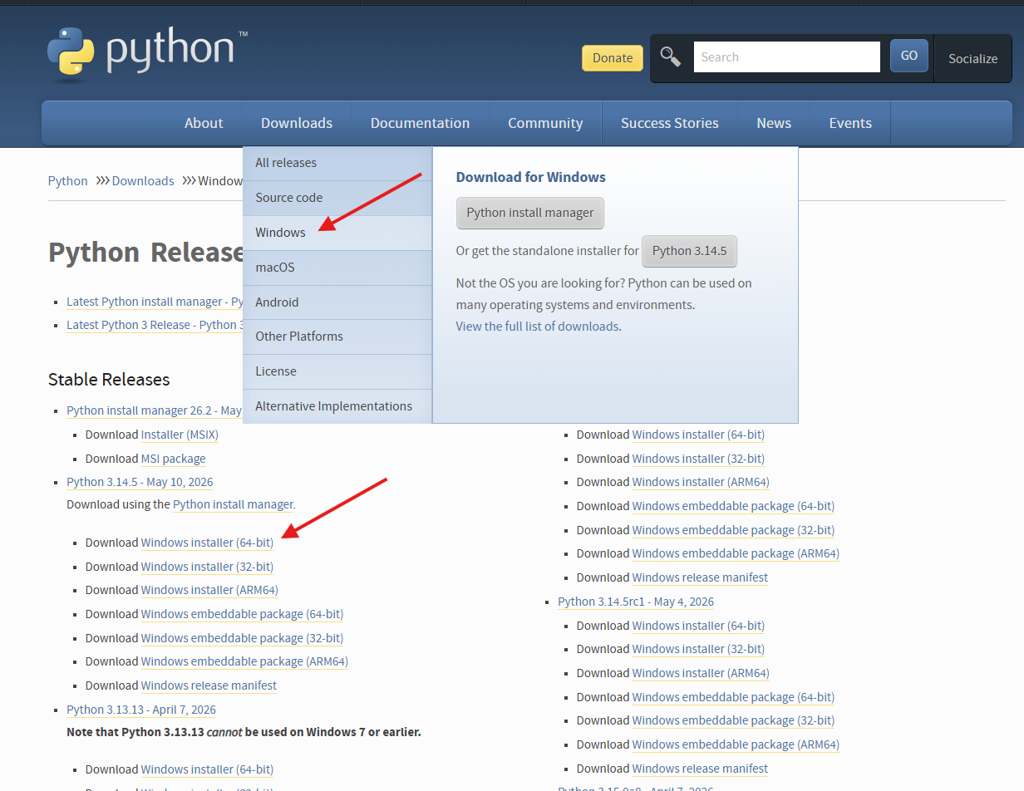
Run the installer. Make sure the option "Add python.exe to PATH" is checked, then click Install Now.
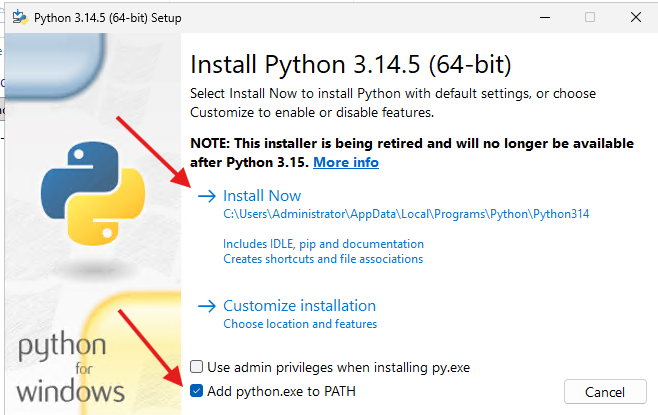
After the installation completes successfully, proceed to the next step.
Step 2: Launch the Installer
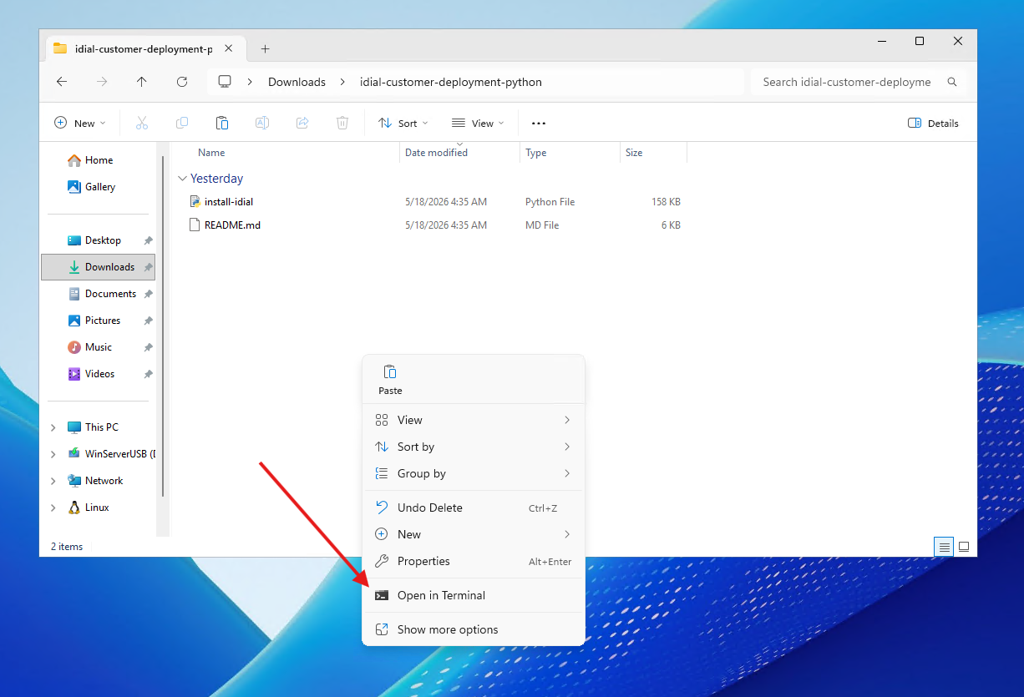
Open Windows Explorer and navigate to the directory containing the deployment script. Right-click in the folder and select "Open in Terminal" from the context menu.
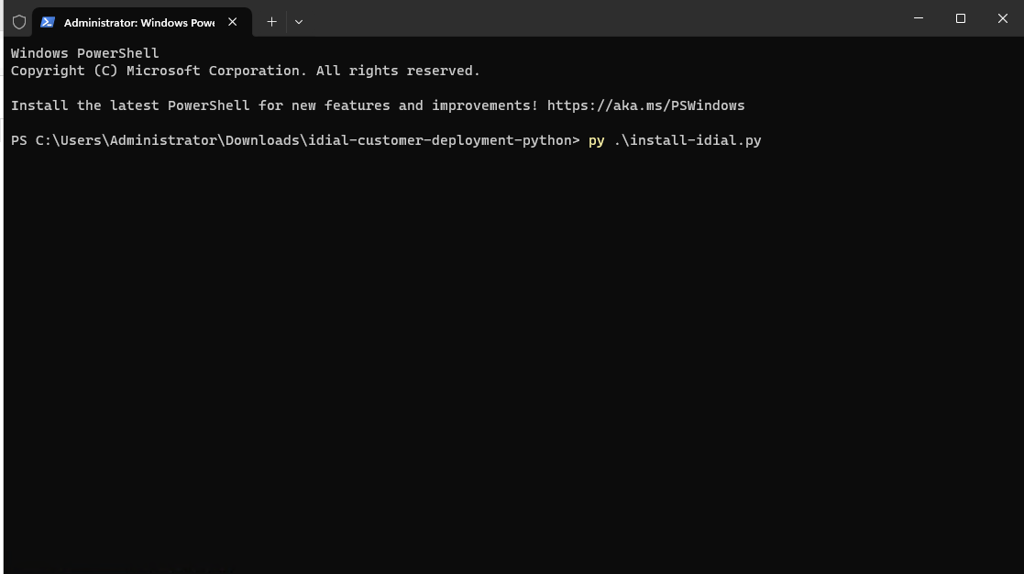
Start the installer script with the following command:
py .\install-idial.py
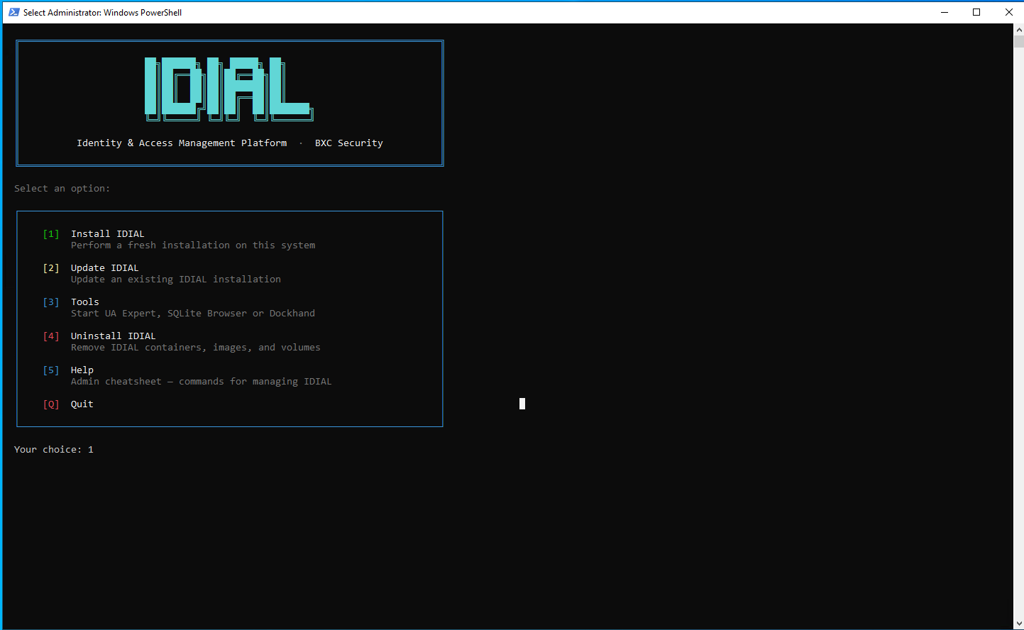
Step 3: Select IDIAL Installation
The installer menu will appear. Select [1] Install IDIAL to begin the installation process.
Step 4: Prerequisites and Docker Desktop
The installer will automatically check all required dependencies. If Docker Desktop is not installed, the installer will offer to install it on your behalf. After Docker Desktop is installed, the script will exit automatically — Docker Desktop must be started before running the script again.
Enable Required Windows Features
Run the following command in an elevated PowerShell session (Run as Administrator) to enable the required Windows features:
Enable-WindowsOptionalFeature -Online -FeatureName VirtualMachinePlatform, Microsoft-Windows-Subsystem-Linux
A system reboot is required after the features are installed.
Update WSL
After rebooting, start Docker Desktop. Docker Desktop will prompt you to update the Windows Subsystem for Linux (WSL).

Run the following command in an elevated PowerShell session:
wsl --update

Once the update is complete, restart Docker Desktop. After Docker Desktop has fully started, the installer can be launched again to continue.
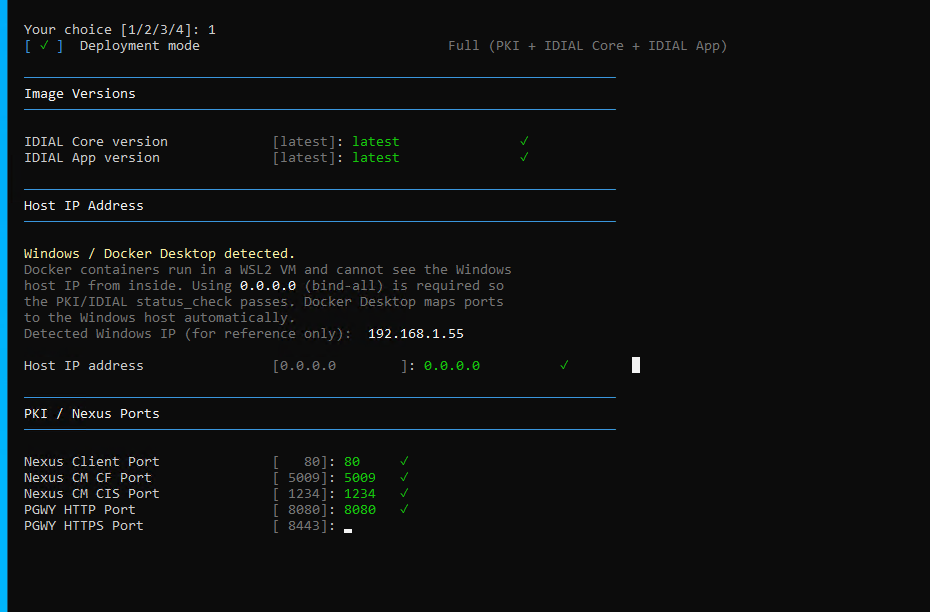
Step 5: Select Deployment Mode
Run the installer script again and select [1] Install IDIAL. After the prerequisites check passes, select the deployment mode that best suits your infrastructure:
| Option | Description |
|---|---|
| [1] Full — PKI + IDIAL Core + IDIAL App (recommended) | Deploys the complete stack including the bundled Nexus PKI, IDIAL Core, and IDIAL App on this machine. |
| [2] IDIAL Core + IDIAL App — external PKI | Deploys IDIAL Core and IDIAL App. A Nexus PKI must be running and reachable externally. |
| [3] IDIAL App only — external IDIAL Core | Deploys only the IDIAL App. IDIAL Core and PKI must already be running and reachable externally. |
| [4] IDIAL Core only — no IDIAL App | Deploys only IDIAL Core. PKI must already be running externally. No IDIAL App is deployed. |

Step 6: Network Configuration
The interactive configuration wizard will prompt you to enter the network settings for your deployment. If you are unsure about a specific value, press Enter to accept the suggested default.
On Windows with Docker Desktop, containers run inside a WSL2 virtual machine and cannot see the Windows host IP directly. The installer therefore automatically sets the host IP to 0.0.0.0 (bind-all). Docker Desktop maps the published ports to the Windows host automatically.
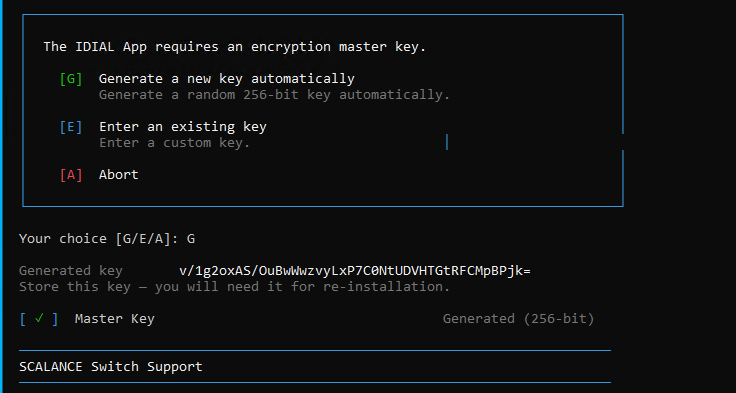
Step 7: Encryption Master Key
The installer will prompt you to either generate a new encryption master key or provide an existing one for IDIAL App.
- [G] Generate a new key automatically — Generates a random 256-bit key.
- [E] Enter an existing key — Allows you to supply a custom key.
Store the generated key in a secure location immediately. It will not be displayed again. You will be required to re-enter this key during future re-installations.
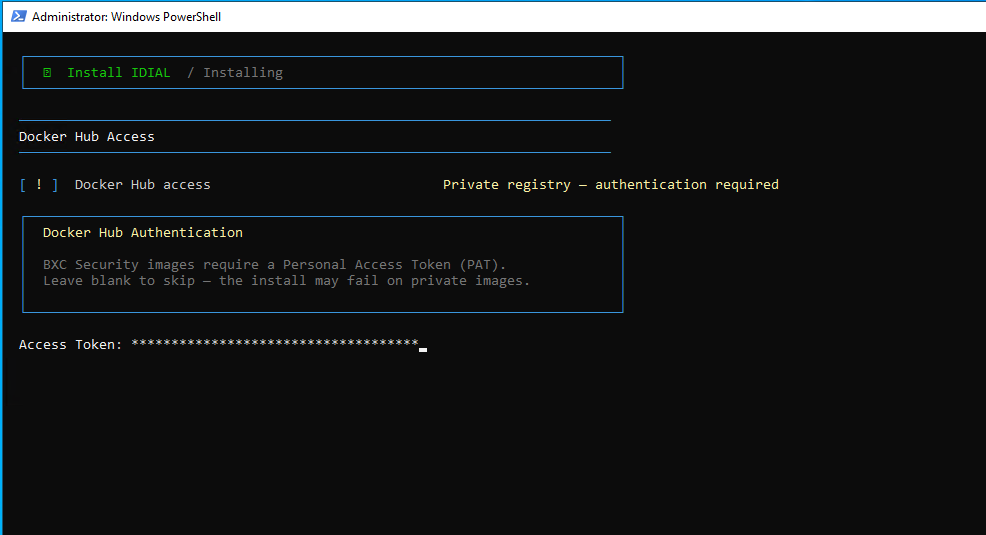
Step 8: Docker Hub Authentication
Once the configuration is complete, the installation will begin. Since IDIAL images are hosted in a private Docker Hub registry, you will be prompted to enter your Personal Access Token (PAT).
Step 9: Installation Process
The installer will now perform the following steps:
- Authenticate with Docker Hub
- Prepare the Docker Compose working directory
- Pull all required container images
- Configure Docker volumes and networks
- Start PKI and IDIAL services

Step 10: Save the IDIAL API Key
Once the installation is complete, all containers will be listed as healthy. The IDIAL API Key will then be displayed.
Store this key in a secure location immediately. It will not be shown again. You will be required to confirm the key by re-entering it before the installer exits.
After saving the key, the installer will display a summary of all service URLs as well as Docker Compose commands for managing the containers manually without the installer.
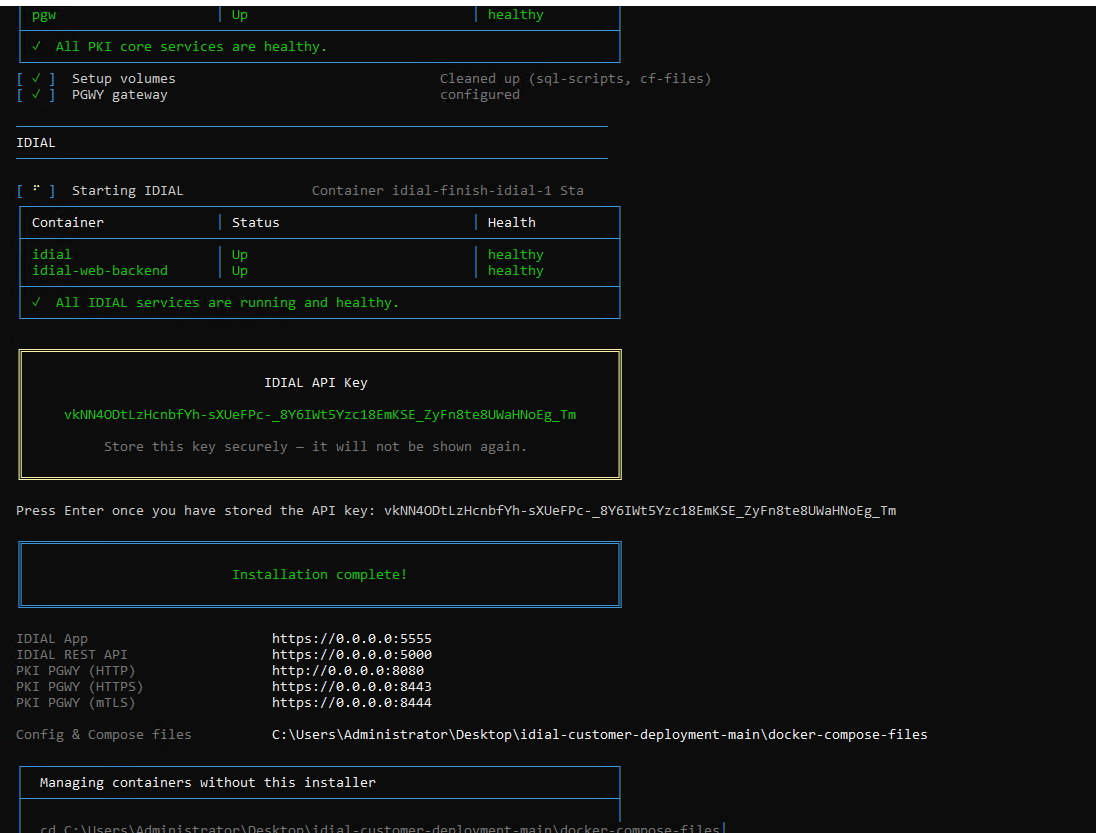

Service URLs
After a successful installation, the services are available at the following addresses (replace <HOST-IP> with the IP address of your Windows system):
| Service | URL |
|---|---|
| IDIAL App | https://<HOST-IP>:5555 |
| IDIAL REST API | https://<HOST-IP>:5000 |
| PKI PGWY (HTTP) | http://<HOST-IP>:8080 |
| PKI PGWY (HTTPS) | https://<HOST-IP>:8443 |
| PKI PGWY (mTLS) | https://<HOST-IP>:8444 |